Cepheo Advanced Ledger Import
Cepheo Business Documents
Document examples
Business Documents configuration
General for all documents
Sales order configuration
Sales invoice
Sales packing slip
Purchase order
Project invoice
Quotation
Interest note
Work report
Dynamic payment information
Release notes Cepheo Business Documents
Cepheo Currency Import
Cepheo Engineering
Cepheo Engineering - Functional overview
Engineering setup
Engineering parameters
Engineering global parameteres
Change notification parameters
Classification Codes Setup
Item property setup
Manufacturer Setup
Material Quality Setup
Product setup
Spare Parts Setup
Released Item Setup
How to use Engineering
Release overview Engineering
Cepheo Expense Extension
Cepheo Expense Power App
Cepheo Foundation
HowTo
License overview
Model upload
Business events
Release overview Foundation
Release notes Foundation
Base.2022.11.2.21
Base.2022.8.2.19
Base.2022.8.2.16
Base.2022.8.2.15
Base.2022.2.2.11
Base.2022.2.2.10
What is Cepheo Foundation
Cepheo Human Resources Extension
Setup Human Resources Extension
Use Human Resources Extension
Release notes Human Resources Extension
What is Human Resources Extension
Cepheo Installation
Setup Installation
How to use Installation
Release overview Installation
Cepheo MVA-melding
MVA Setup
MVA Reporting
Step 4: Reporting
Step 4 | Section 1: Tax reports
Step 4 | Section 2: Standard tax codes
Step 4 | Section 3: Tax specifications
Step 4 | Section 4: Report remark
MVA Multicompany setup
MVA Intercompany setup
MVA Intercompany Tax report
Cepheo SAF-T reporting
Cepheo Sales Integration
Cepheo Shipment Booking
Shipment booking setup
Shipment booking external values
Transform addresses, senders and recipients to address quick ID's
Transform label
Transform carrier information
Transform country, state and county
Transform currency code
Transform print favorite
Transform shipment payer account
Transform container types
Transform shipment booking status
Transform security group
Shipment booking parameters
Document transformations
Shipment booking senders
Shipment booking labels
Shipment booking print favorites
Shipment booking security group (nShift Delivery)
Carrier container type
Shipment booking cost rule
Import Carrier setup
Setup of carriers
Shipment booking Sender
Shipment booking app setup
How to use Shipment booking
Notification contacts
Consolidate shipment bookings from Create Shipment booking dialog
Maintain content lines on a Container on a Shipment booking
Release overview Shipment booking
Cepheo Subscription
Cepheo Test and Certification
Cepheo Timesheet Extension
- All Categories
- Cepheo Expense Power App
- Implementation Guide
Implementation Guide

Virtual entities from D365FO
The below virtual entities from D365FO must be activated in the Power Platform environment.
# | Virtual Entity Name |
1 | AdTrvExpenseAttachmentEntity |
2 | AdTrvExpenseLineEntity |
3 | AdTrvProjValEmplProjSetupEntity |
4 | AdTrvPerDiemsAbroadEntity |
5 | AdTrvWorkerEntity |
6 | AdTrvExpenseDataEntity |
7 | AdTrvParametersEntity |
8 | AdTrvProjectNameActivityNameEntity |
9 | AdTrvExpenseTableEntity |
10 | AdTrvExpenseTypeEntity |
11 | CurrencyEntity |
12 | TrvExpenseCategoryEntity |
13 | TrvPayMethodEntity |
14 | TrvPerDiemLocationsEntity |
15 | AdTrvProjectNameEntity |
16 | AdTrvLocationsEntity |
17 | TrvExpensePurposeEntity |
18 | HcmWorkerEntity |
19 | ExpenseJournalLineEntity |
20 | HcmEmployeeV2Entity |
D365FO Setup
Below is an explanation of necessary setup and definitions in D365FO.
Batch job setup
When the expense report is submitted from the app, the expense lines with Approval status ''Draft'' will be set to ''Ready'':
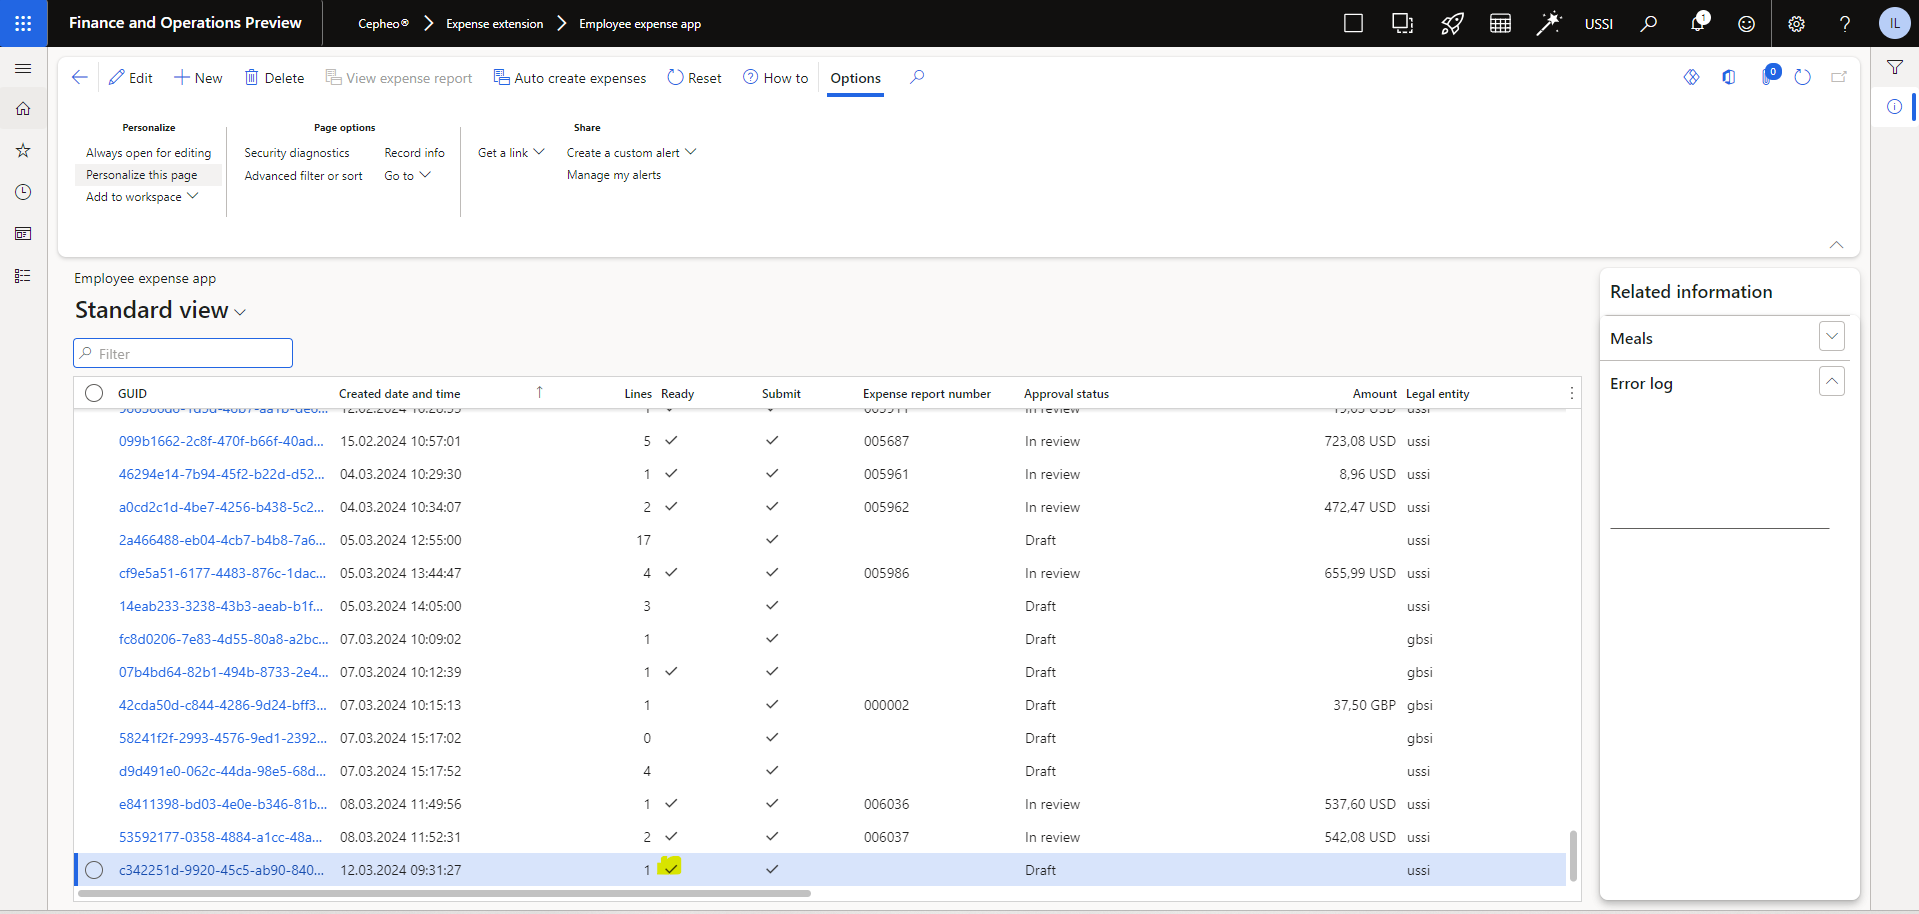
To automatically create the expense report in D365FO, the Cepheo Auto Expense batch job must be run (see Auto create expenses on top row in above screenshot).
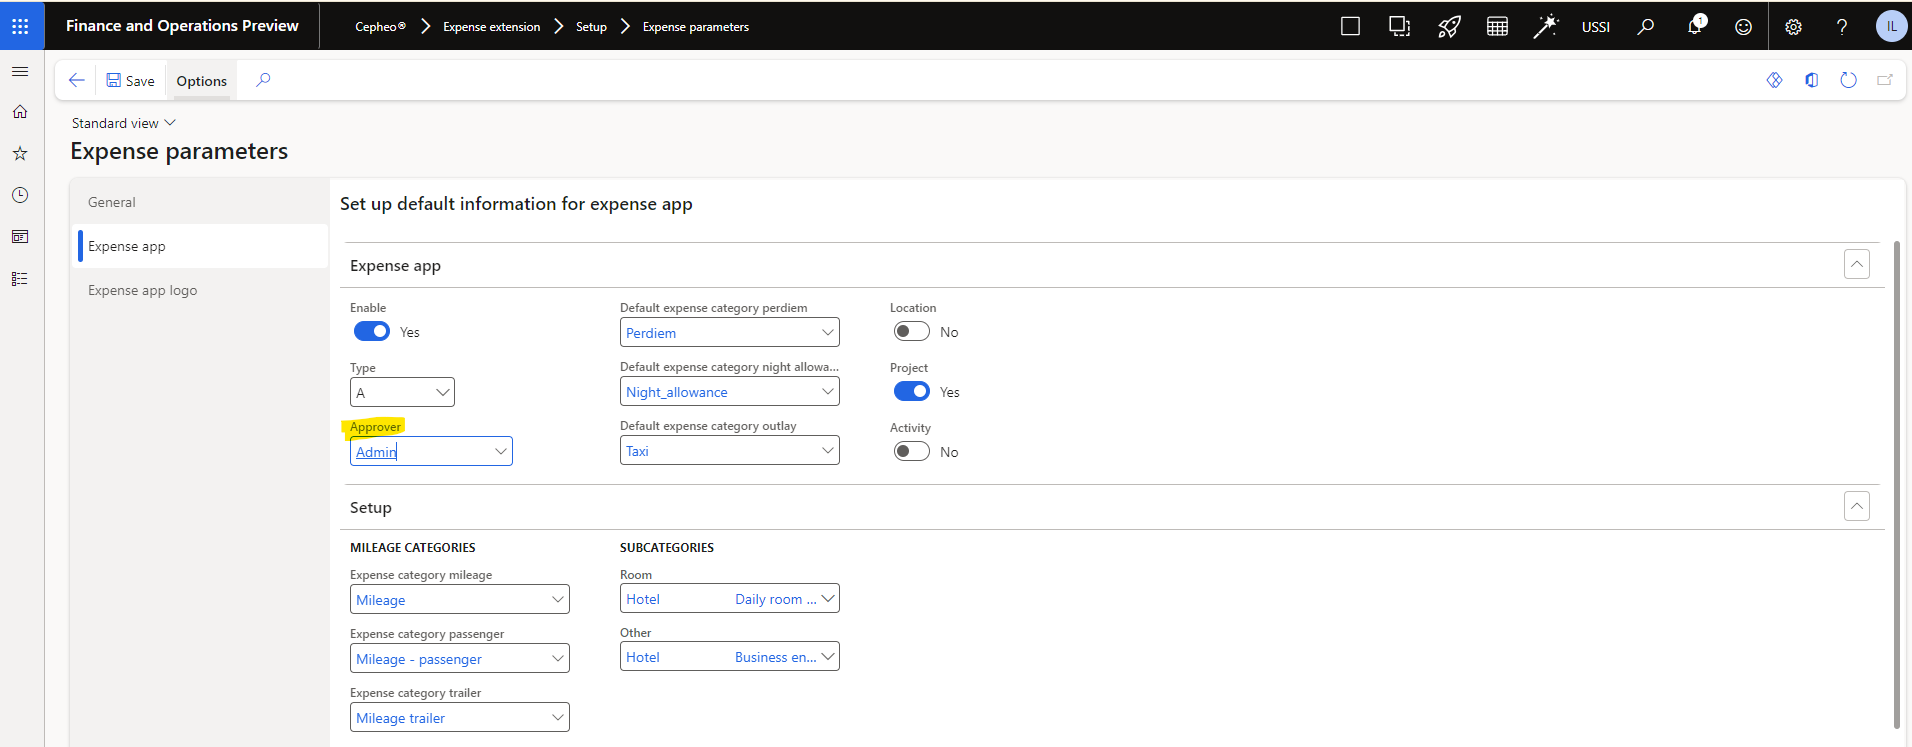
To avoid setting up one specific user as delegate for all users, it is important to set up the batch job to be run by the same user as defined in Expense parameters:
Expense Category Setup
If you attempt to activate and register an expense line with invalid expense type, the line will fail in D365 FO
Night allowance
The below screenshot explains which explain the fields that are relevant for a Night Allowance setup.
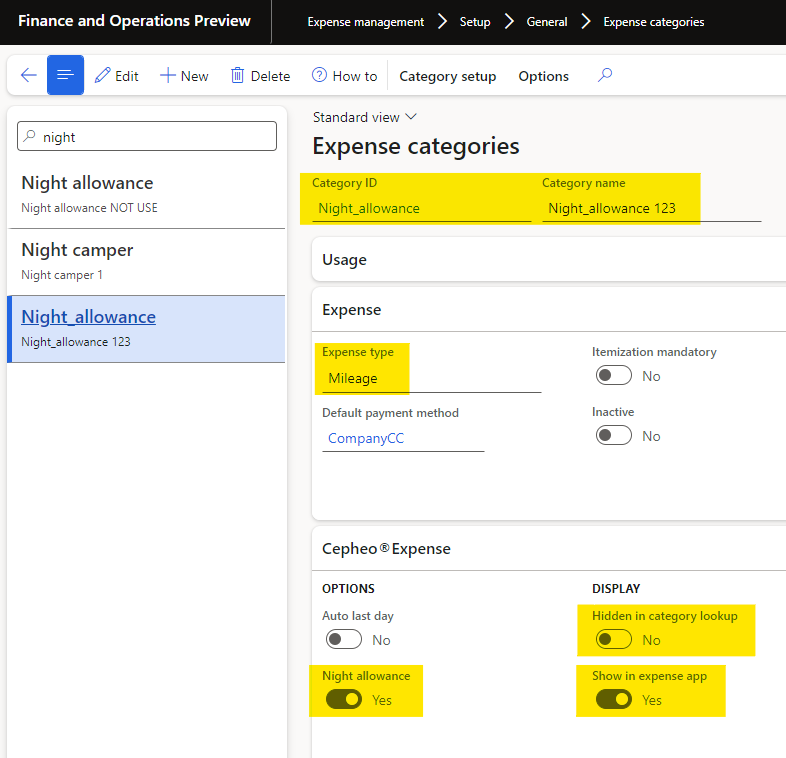
- Category Name is the label that the users will see from the Expense App.
- Expense type must be Mileage in order to register rates (this is defined on the Shared category):


- 'Night Allowance' toggle switch must be activated
- 'Show in expense app' toggle switch must be activated
Per diem
The Per diem Expense category must be linked to a Shared category with Expense type = 'Per diem':
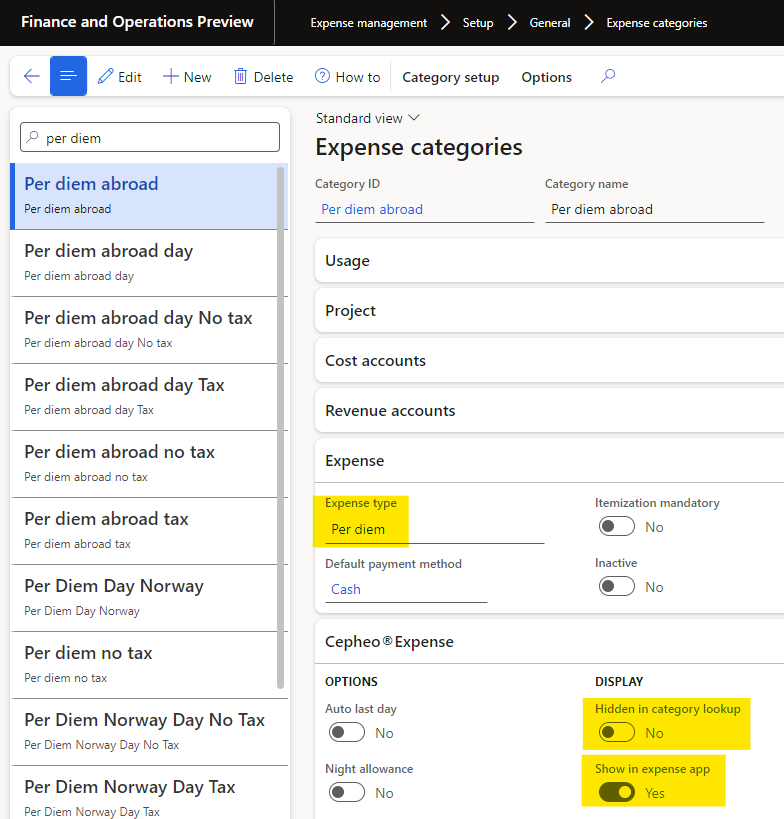
To allow users to registrer expenses towards the Per diem category, the 'Hidden in category lookup' toggle switch must be turned off (as the screenshot above explains). If the Per diem category is to be hidden, activate the toggle switch ''Hidden in category lookup'.
Per diem Locations
Cepheo Expense Location Filter is used to setup a connection between a Per diem expense category and locations.
It is possible to register either locations to be included OR location to not be included (excluded) for the selected Per diem location.
Example 1: Include locations
To include the locations added to the list of locations on the selected Per diem category, one must not enable the 'Exclude' toggle switch, as explained in screenshot below:
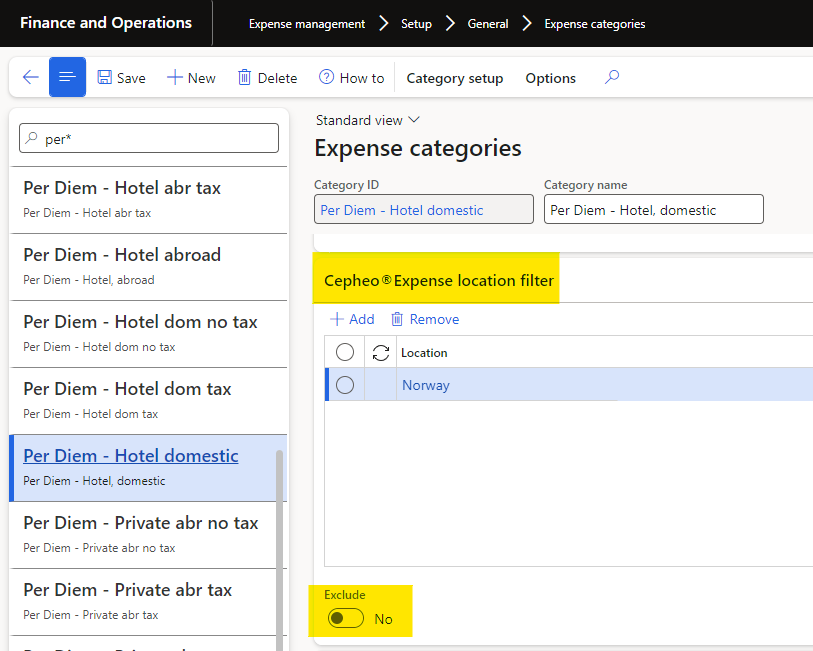
With this setup, the end user will only be able to select Location = 'Norway' when the 'Per Diem - Hotel domestic' category is selected.
Example 2: Exclude locations
To exclude the locations entered in the list, the 'Expense' toggle switch must be enabled:
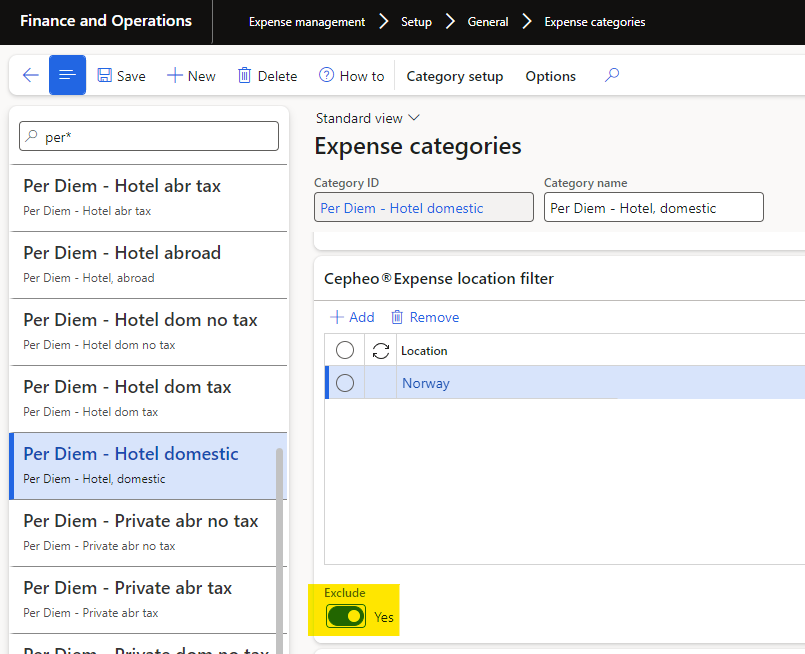
With this setup, the end user will be able to select all locations registered in F&O except the 'Norway' location.
After defining locations included/excluded
When the setup explained above is finished it is important to go to Expense parameters and select '+ Add all' to add the setup into a table list that is retrieved by the app:
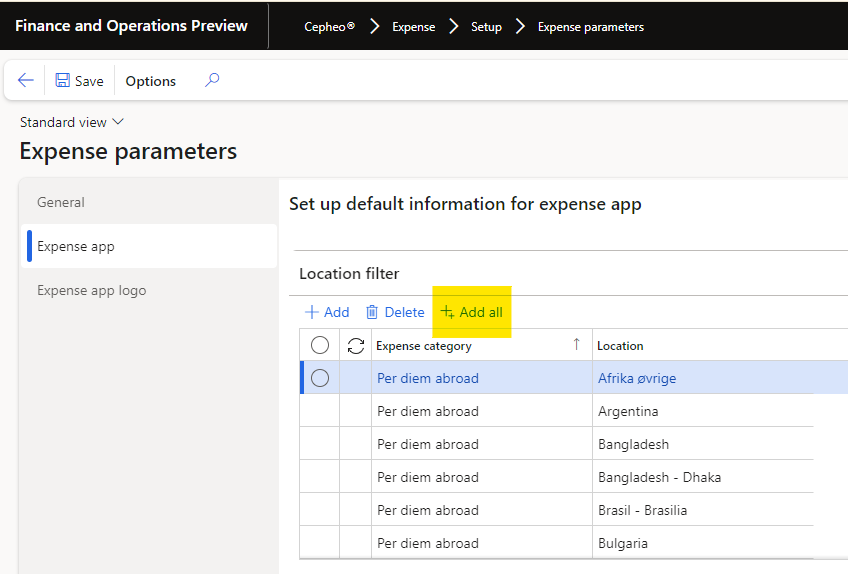
One may also select '+ Add' to add the dependencies from Expense parameters.
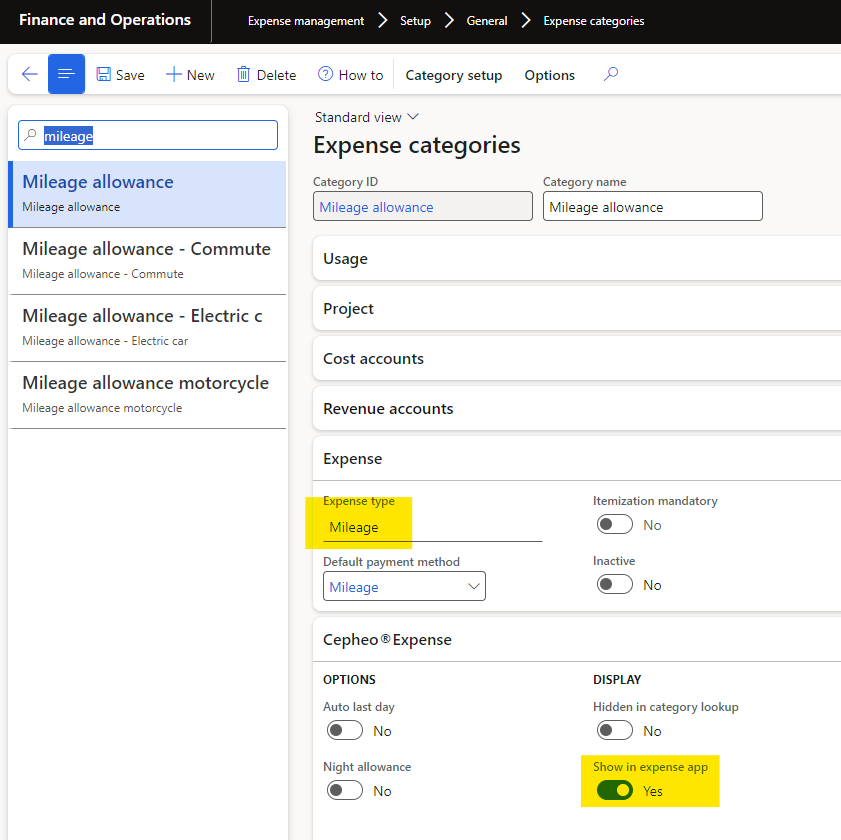
Mileage
To allow registration of Mileage, the expense category must be setup with Expense type = 'Mileage'. Additionally, the 'Show in expense app' toggle switch must be enabled:
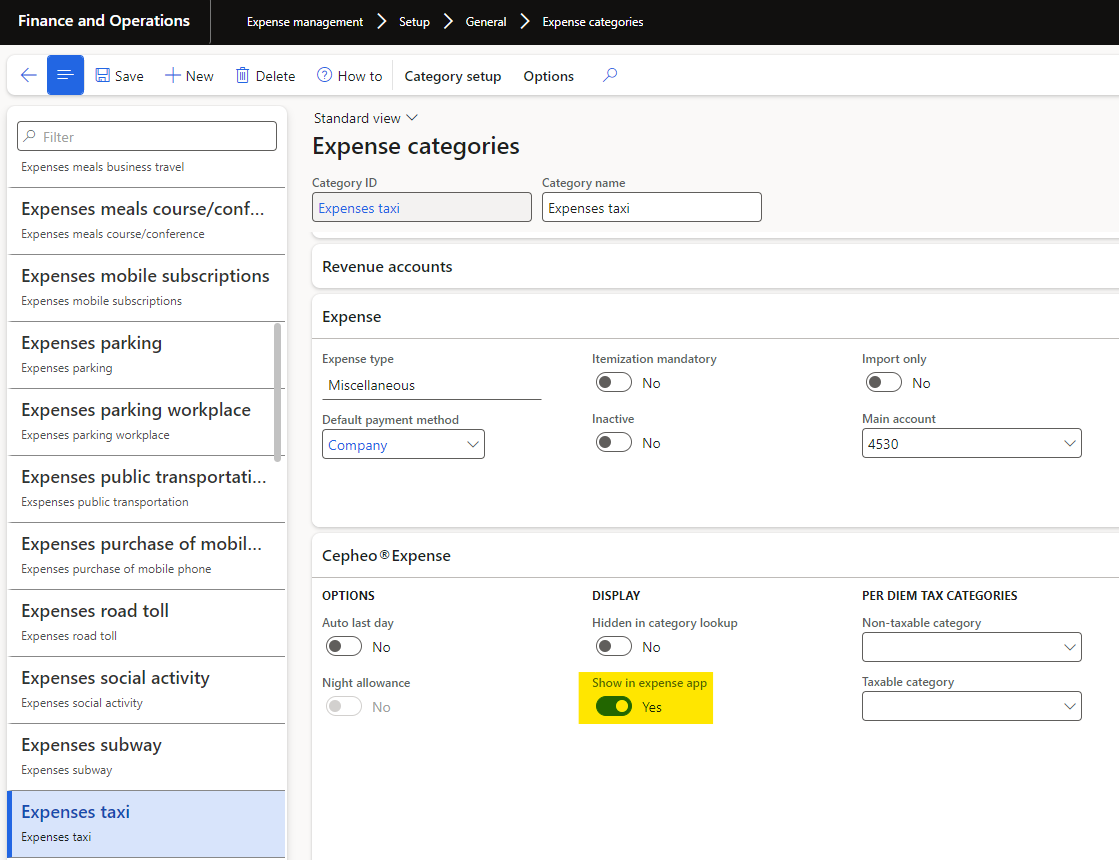
Outlay
From the Outlay app screen the end users can register outlay with receipts by uploading a file or directly by taking a picture of the receipt with their mobile phone.
Outlay expense categories must be setup with Expense type = Miscellaneous and be enabled to 'Show in expense app' to make the category available from the app:
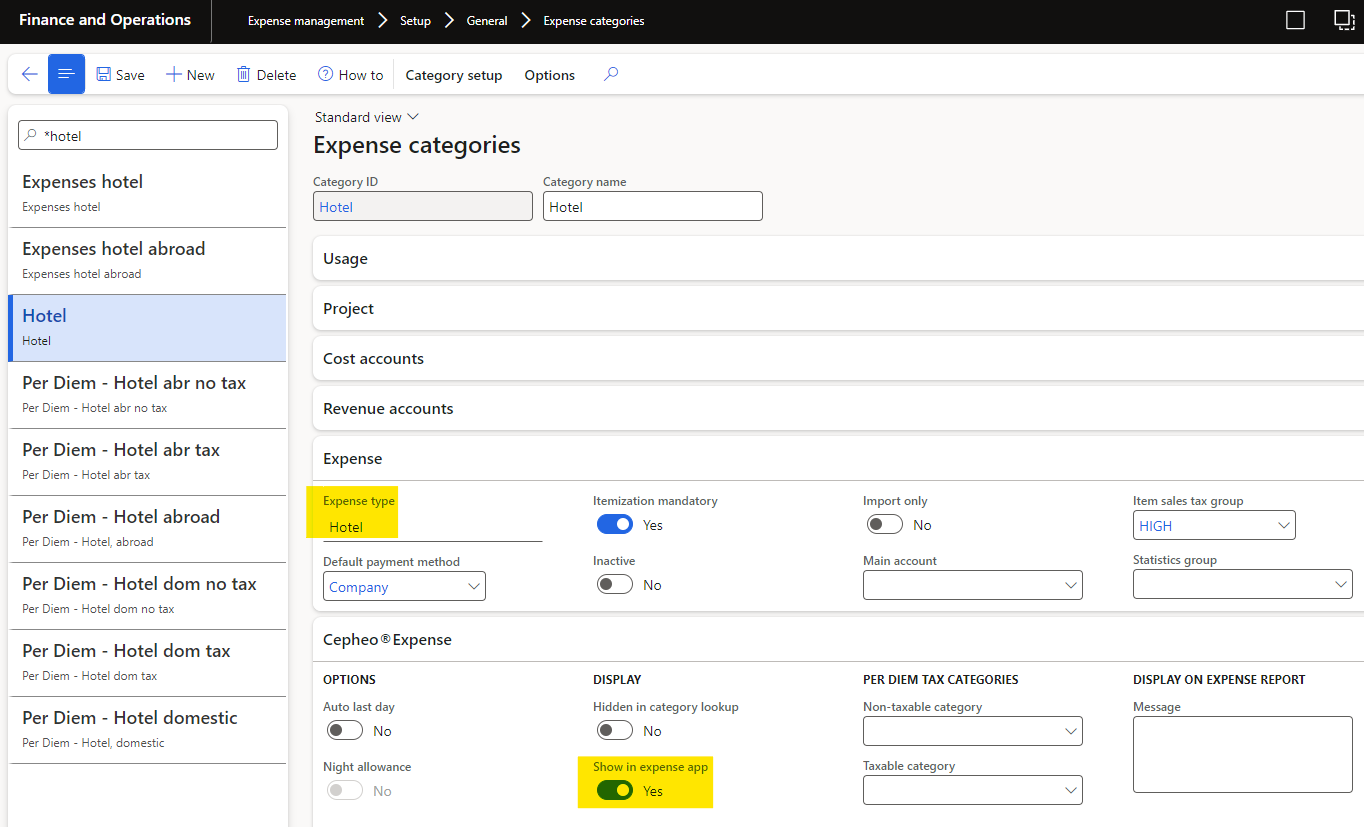
Hotel
It is possible to setup an expense category for Hotel that allows registration of itemization from the app. This expense category will be available from the Outlay app screen.
The Expense category must be set up with Expense type = 'Hotel' for itemization to be activated for this category. Expense type is defined on the Shared category:
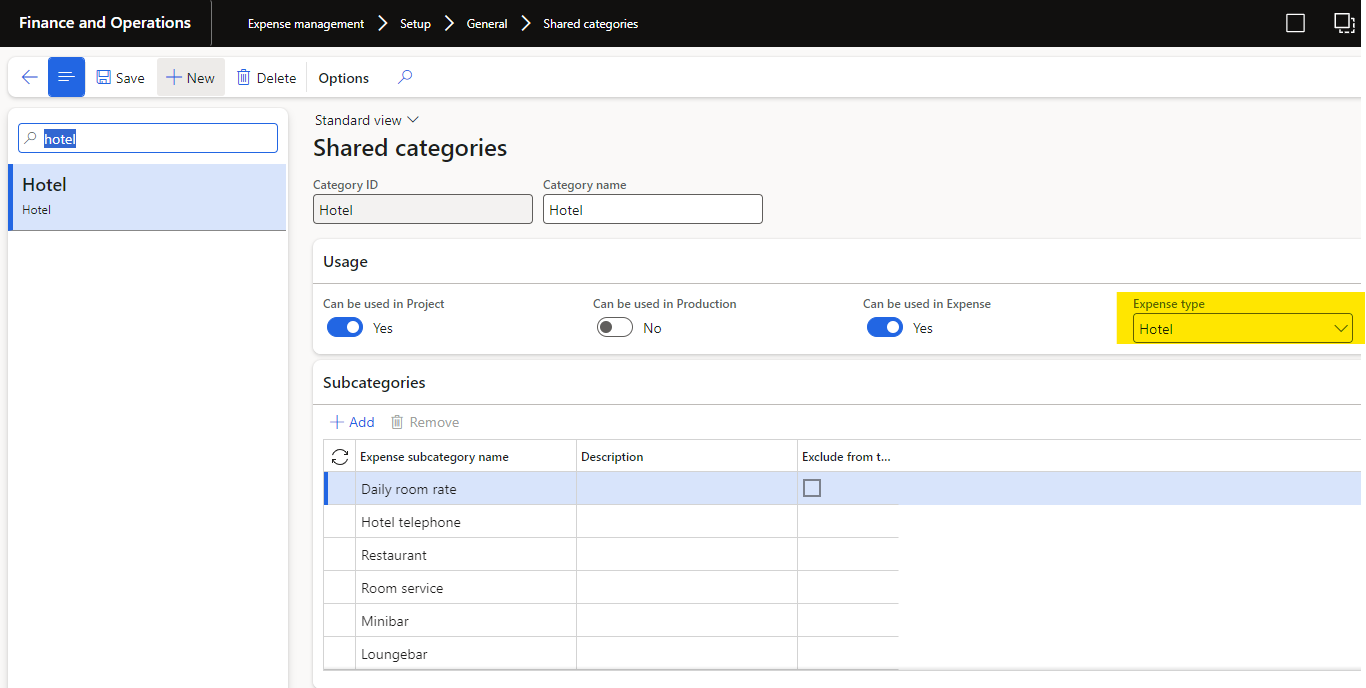
The expense category for Hotel must be linked to the Shared category with Expense type = 'Hotel' and be activated to be available from the app: