Cepheo Advanced Ledger Import
Cepheo Business Documents
Document examples
Business Documents configuration
General for all documents
Sales order configuration
Sales invoice
Sales packing slip
Purchase order
Project invoice
Quotation
Interest note
Work report
Dynamic payment information
Release notes Cepheo Business Documents
Cepheo Currency Import
Cepheo Engineering
Cepheo Engineering - Functional overview
Engineering setup
Engineering parameters
Engineering global parameteres
Change notification parameters
Classification Codes Setup
Item property setup
Manufacturer Setup
Material Quality Setup
Product setup
Spare Parts Setup
Released Item Setup
How to use Engineering
Release overview Engineering
Cepheo Expense Extension
Cepheo Expense Power App
Cepheo Foundation
HowTo
License overview
Model upload
Business events
Release overview Foundation
Release notes Foundation
Base.2022.11.2.21
Base.2022.8.2.19
Base.2022.8.2.16
Base.2022.8.2.15
Base.2022.2.2.11
Base.2022.2.2.10
What is Cepheo Foundation
Cepheo Human Resources Extension
Setup Human Resources Extension
Use Human Resources Extension
Release notes Human Resources Extension
What is Human Resources Extension
Cepheo Installation
Setup Installation
How to use Installation
Release overview Installation
Cepheo MVA-melding
MVA Setup
MVA Reporting
Step 4: Reporting
Step 4 | Section 1: Tax reports
Step 4 | Section 2: Standard tax codes
Step 4 | Section 3: Tax specifications
Step 4 | Section 4: Report remark
MVA Multicompany setup
MVA Intercompany setup
MVA Intercompany Tax report
Cepheo SAF-T reporting
Cepheo Sales Integration
Cepheo Shipment Booking
Shipment booking setup
Shipment booking external values
Transform addresses, senders and recipients to address quick ID's
Transform label
Transform carrier information
Transform country, state and county
Transform currency code
Transform print favorite
Transform shipment payer account
Transform container types
Transform shipment booking status
Transform security group
Shipment booking parameters
Document transformations
Shipment booking senders
Shipment booking labels
Shipment booking print favorites
Shipment booking security group (nShift Delivery)
Carrier container type
Shipment booking cost rule
Import Carrier setup
Setup of carriers
Shipment booking Sender
Shipment booking app setup
How to use Shipment booking
Notification contacts
Consolidate shipment bookings from Create Shipment booking dialog
Maintain content lines on a Container on a Shipment booking
Release overview Shipment booking
Cepheo Subscription
Cepheo Test and Certification
Cepheo Timesheet Extension
- All Categories
- Cepheo Expense Extension
- Expense Extension Setup
- Setup Cepheo Expense Extension
Setup Cepheo Expense Extension

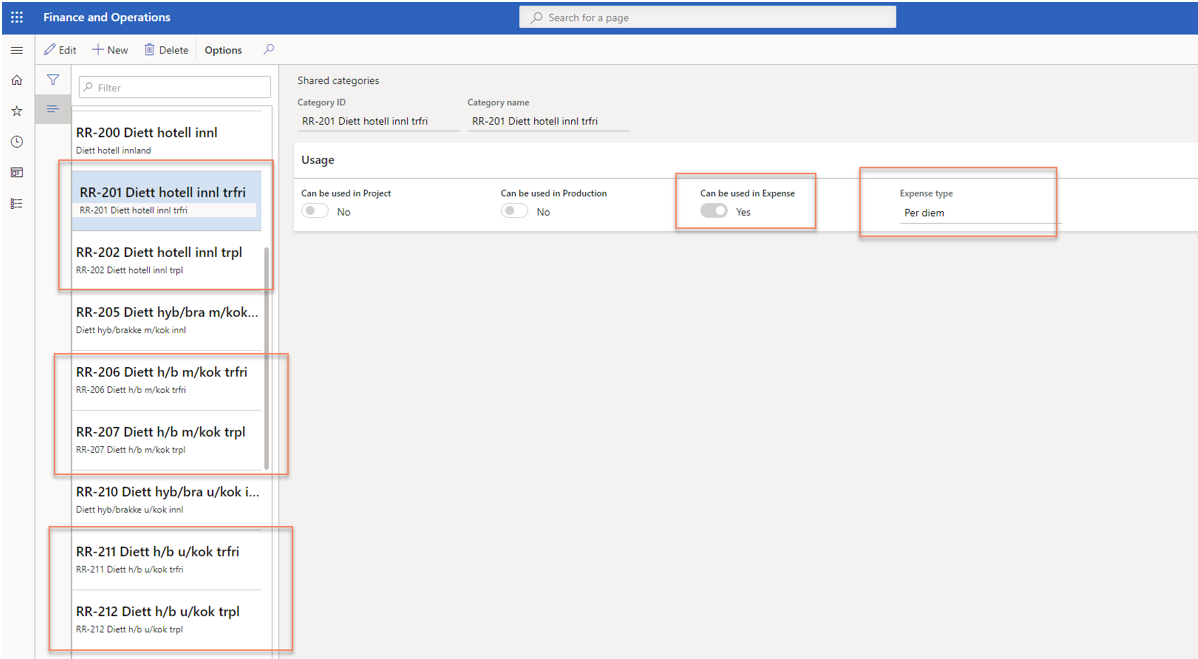
Creation of two Per diem tax categories for each Main category.
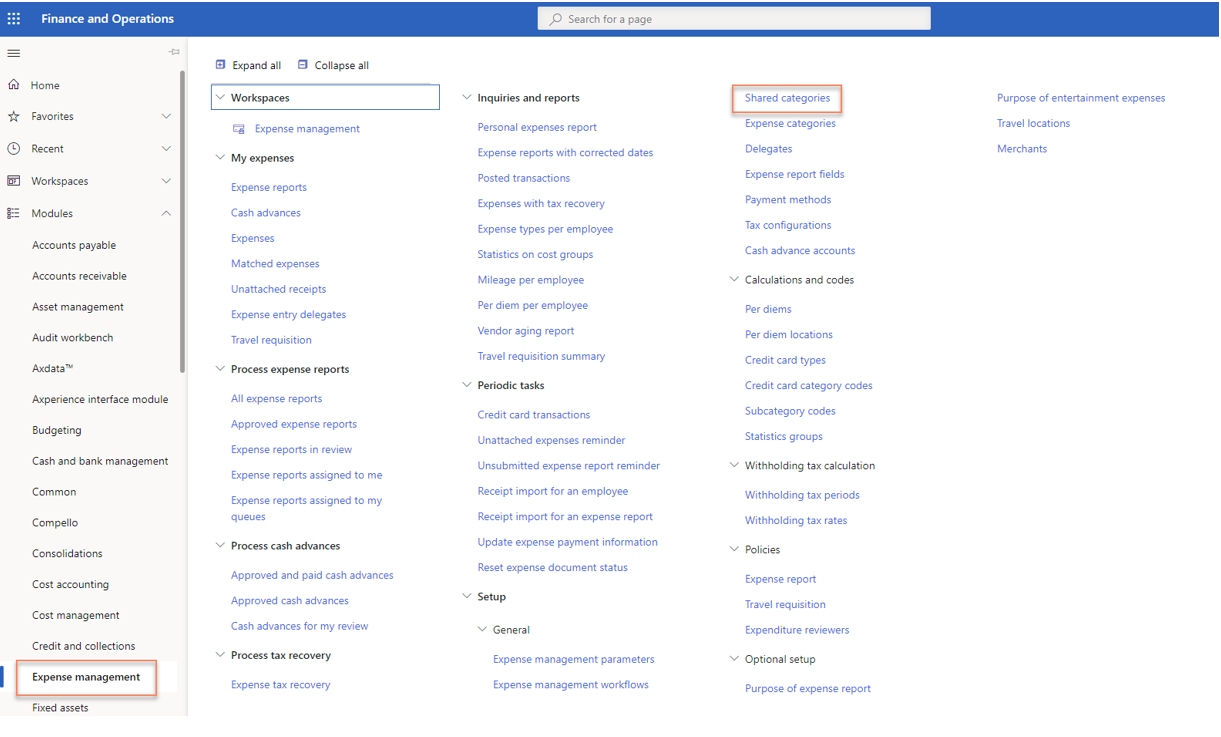
Navigate to: Expense Management > Setup > General > Shared categories
Name the new categories as you like, but we recommend that you name them the same as the main category only with the first category referring to “Taxable” and the second category referring to “Non-taxable”.
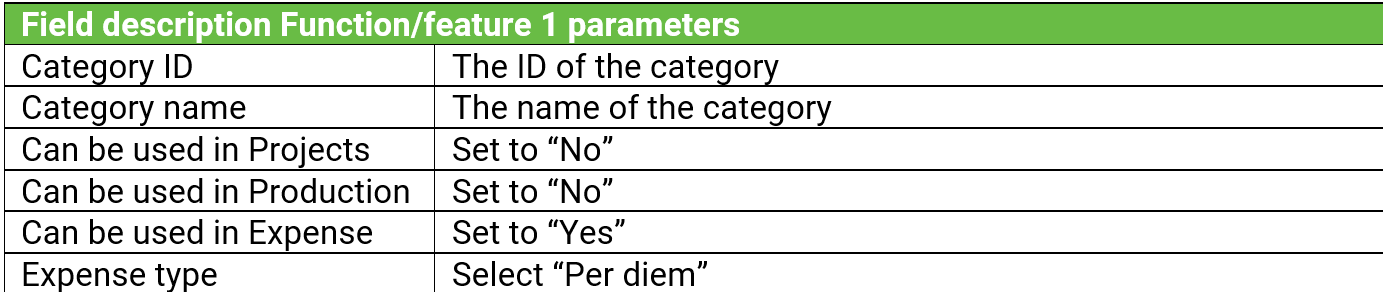
Set the Usage for each category as described in the table after the screenshot under.
· For Main category RR-200: Create RR-201 (taxable) and RR-202 (non-taxable)
· For Main category RR-205: Create RR-206 (taxable) and RR-207 (non-taxable)
· For Main category RR-210: Create RR-211 (taxable) and RR-212 (non-taxable)
· For Main category RR-215: Create RR-216 (taxable) and RR-217 (non-taxable)
· For Main category RR-220: Create RR-221 (taxable) and RR-222 (non-taxable)
· For Main category RR-230: Create RR-231 (taxable) and RR-232 (non-taxable)
· For Main category RR-245: Create RR-246 (taxable) and RR-247 (non-taxable)
· For Main category RR-250: Create RR-251 (taxable) and RR-252 (non-taxable)
Activate the Per diem tax categories and assign them to the correct Main category
Navigate to: Expense Management > Setup > General > Expense categories
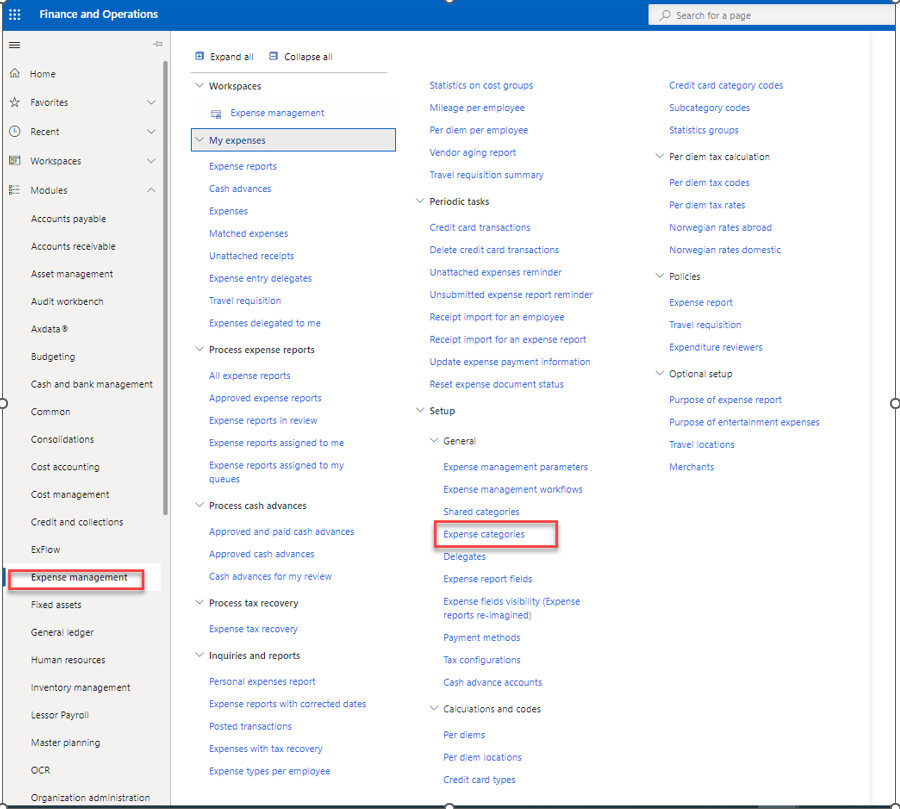
Activate the per diem categories you created
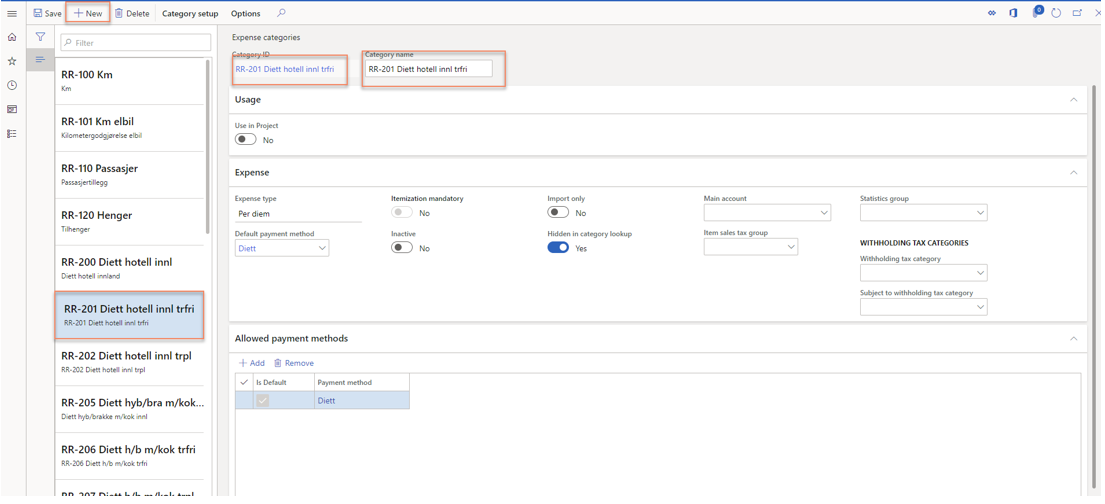
Click “New” and select one of the categories you created in section 1 (when a category is selected here, it will not be shown in the drop-down list anymore, so it’s not possible to select the same category twice). Do this for all the categories that will be used in the current Legal Entity and have the parameters for each category set as shown in the image below (when “Hidden in category lookup” is set to Yes, employees will not see this category. They will only see the main category that they should choose when creating an expense report):
Assign the Per diem tax categories to the correct Main category
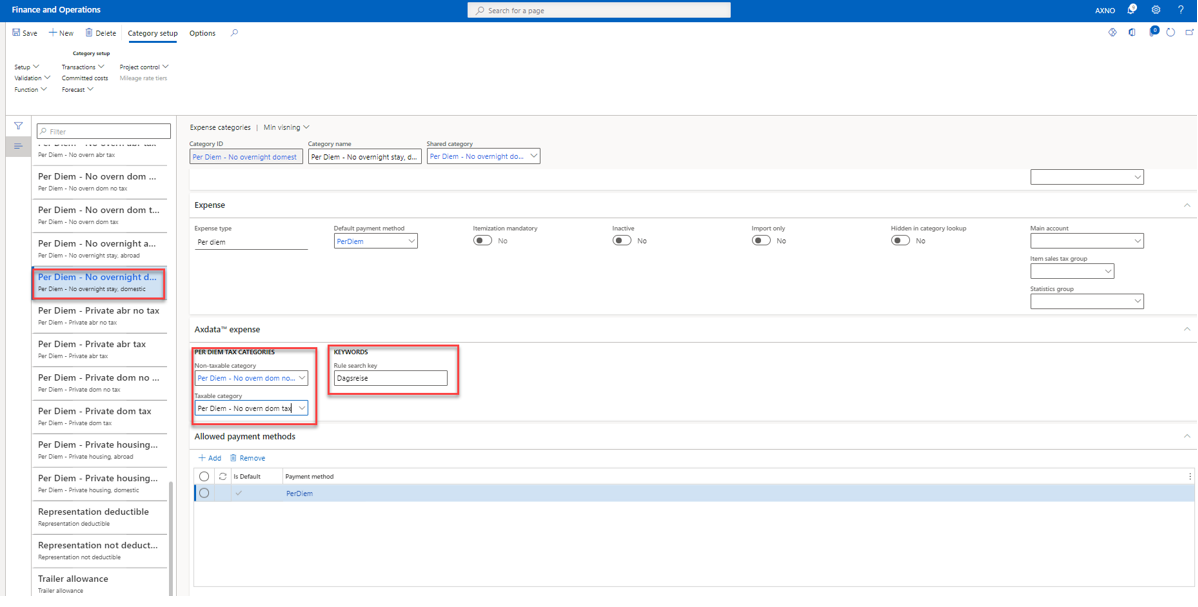
Select the first main category, RR-200. Under the Expense area, select RR-201 as the “Taxable category” and RR-202 as the “Non-taxable category”. Do the same for all the Main categories:

For expense categories without overnight stay you also have to type in a Keywords, Rule search key. This have to be the same that is typed in under Expense management parameters, "Cepheo kostgodtgjørelse", Suffix value.

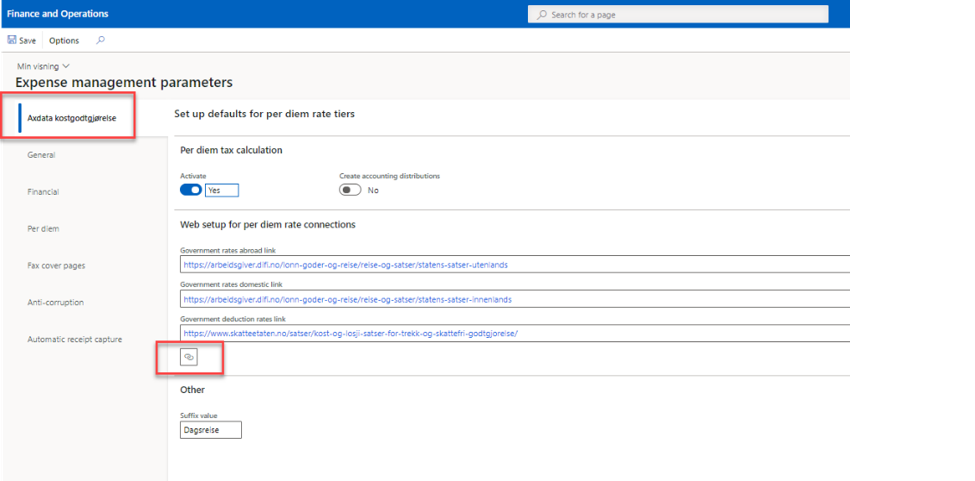
Expense Extension, Setup, General, Expense management parameters, "Cepheo Kostgodtgjørelse"
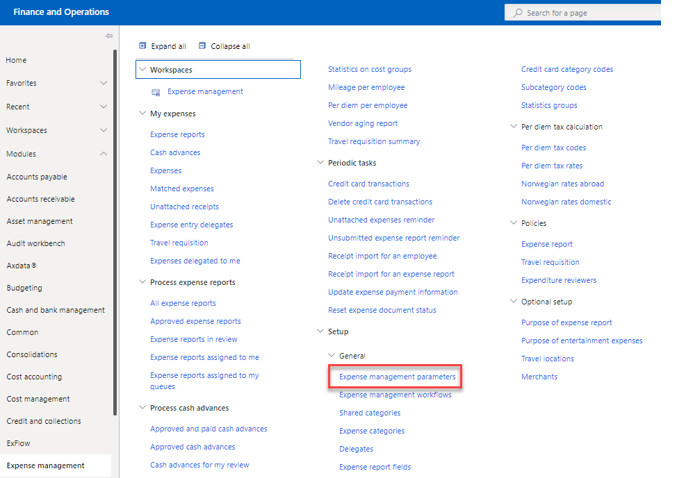
Navigate to: Expense Management > Setup > General > Expense management parameters
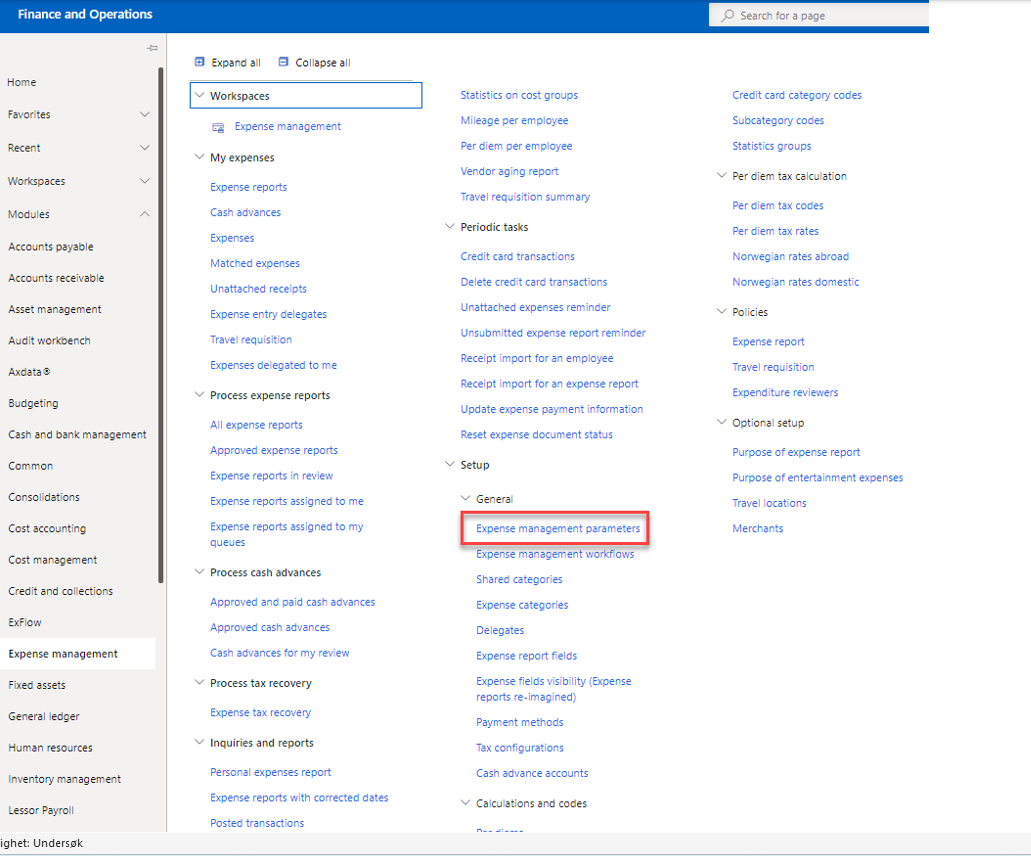
Press the menu button marked in red below, and the URL’s will automatically be filled in.
The parameter Activate shall not be put to YES before the whole setup is done.
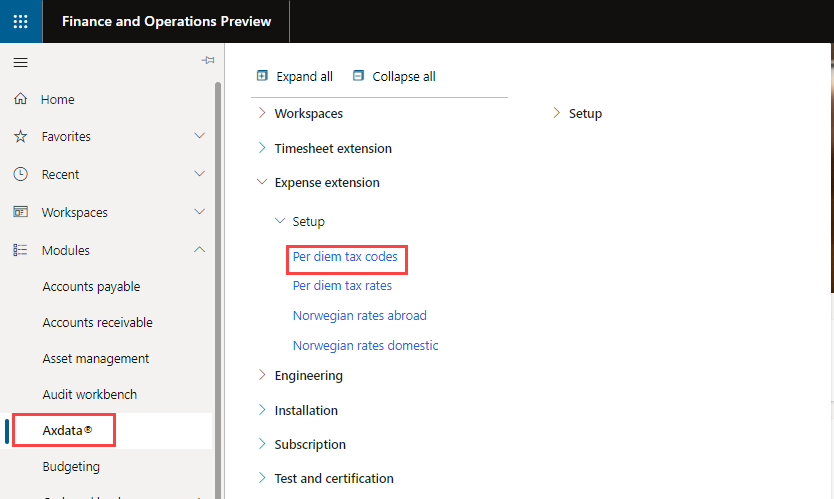
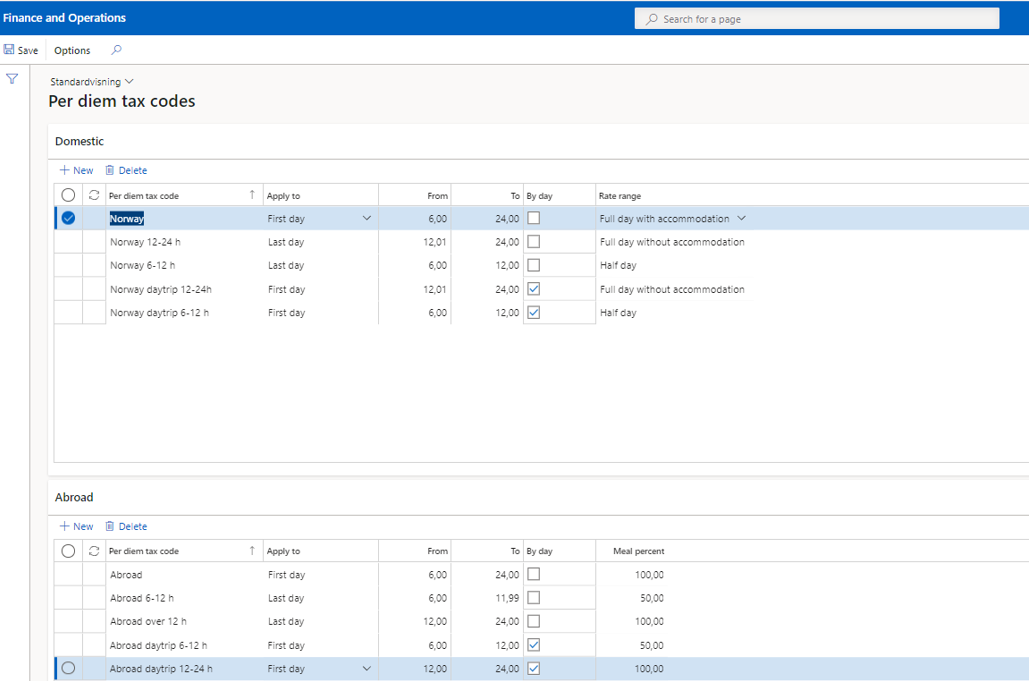
Create Per diem tax codes
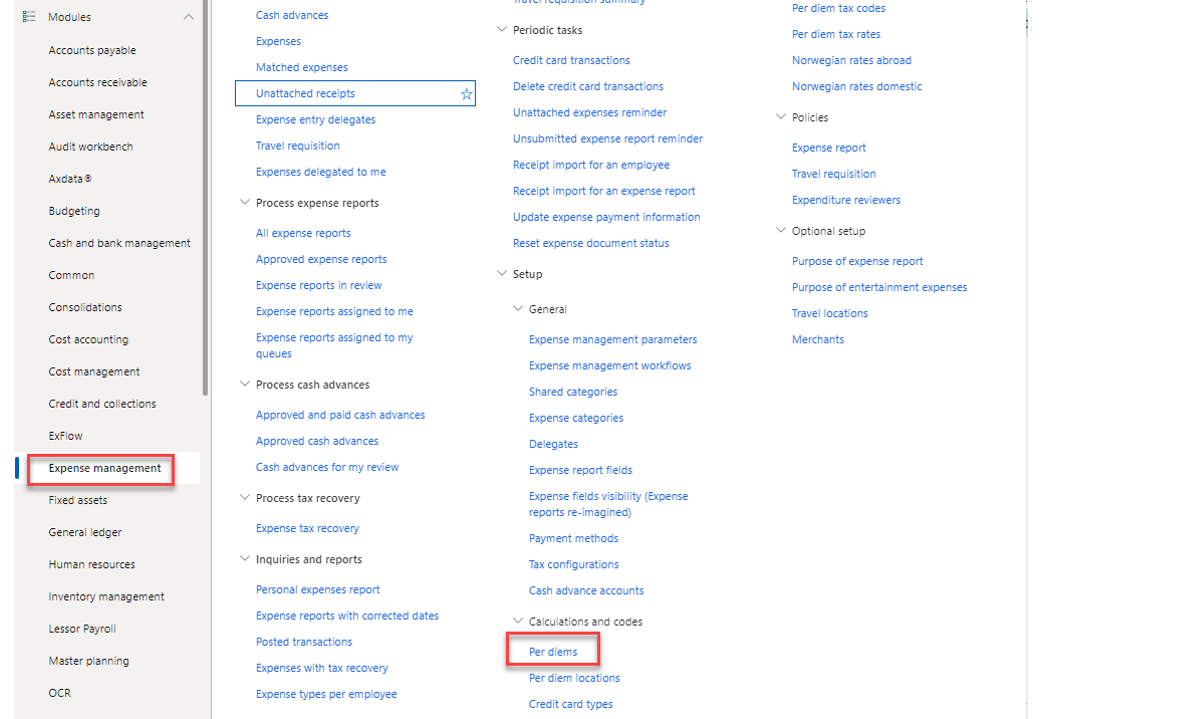
Navigate to: Cepheo Expense extension > Setup > Per diem tax codes
Create the codes as shown in the screenshot under. The names in the screenshot are examples, you can name them as you like, but make sure that all the different periods are created
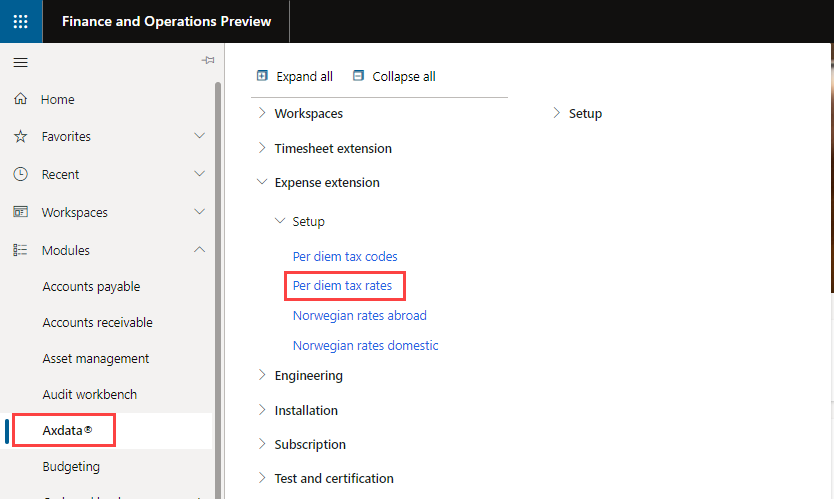
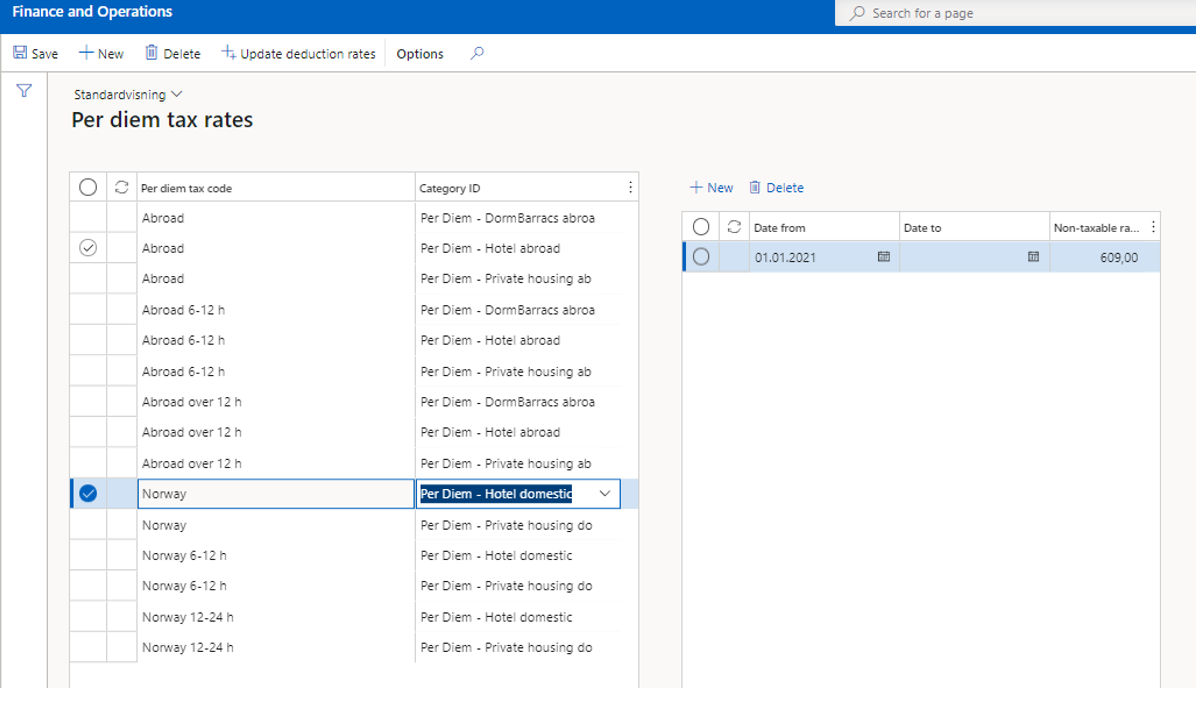
Create Per diem tax rates
Navigate to: Cepheo Expense extension > Setup > Per diem tax rates
Connect the Main categories to all the “Per diem tax codes” that is valid for the Main category and state the rate that is valid for this year. Click “+ New” in the upper left corner, select the Per diem tax codes and Main category, and state the valid rate. These rates must be updated every year.
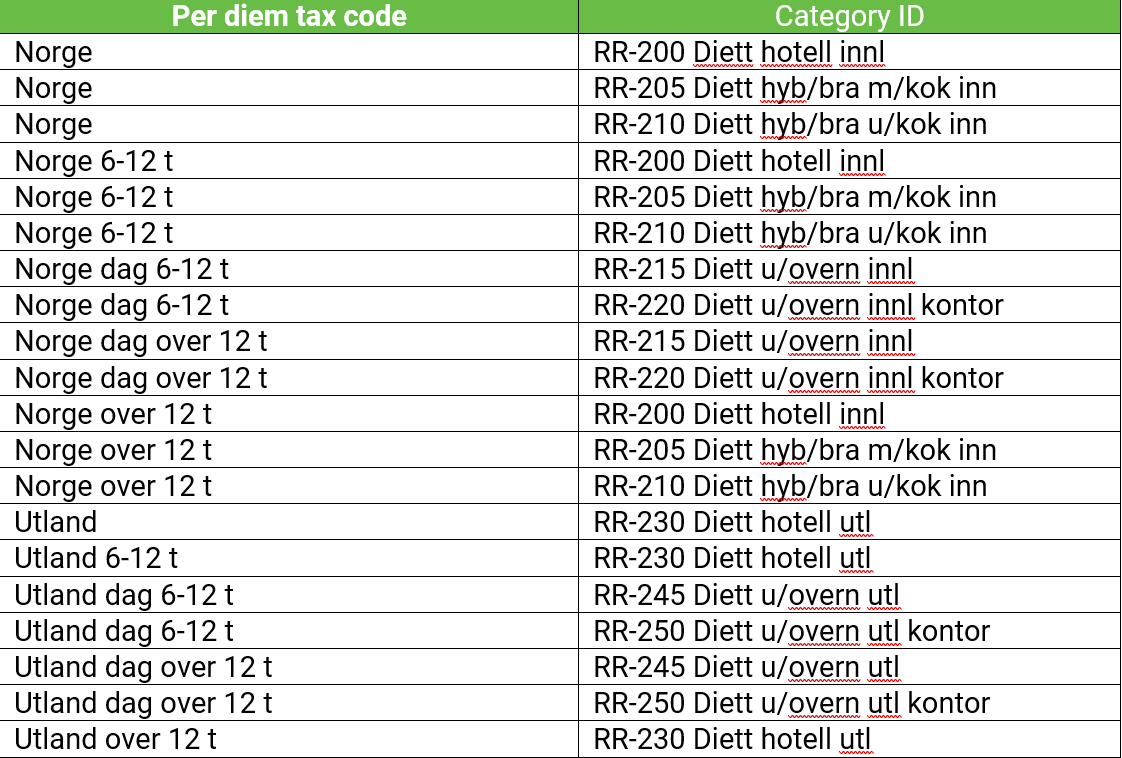
The picture under shows the connection for Main category “RR-200” and Per diem tax codes “Norge” as an example, and the table on the next page lists all connections that normally has to be set up (as stated earlier, the names of the categories are examples):
Non-taxable rates can be imported. Select Update deduction rates as marked in the picture below:

Select Get current rates.
The rates will come as marked in the picture below.
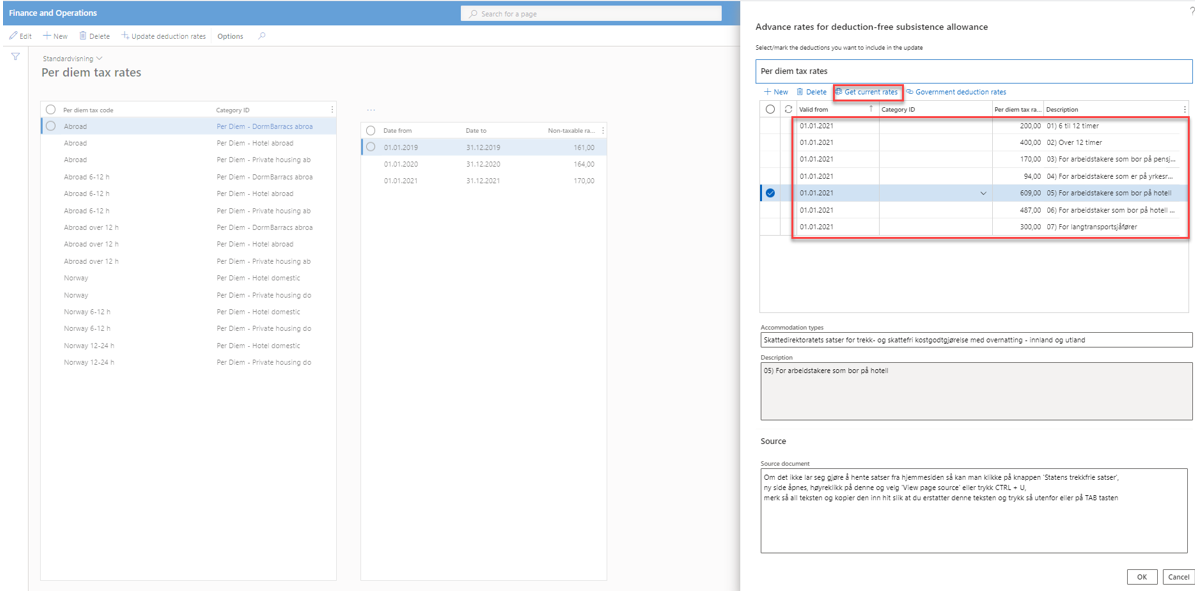
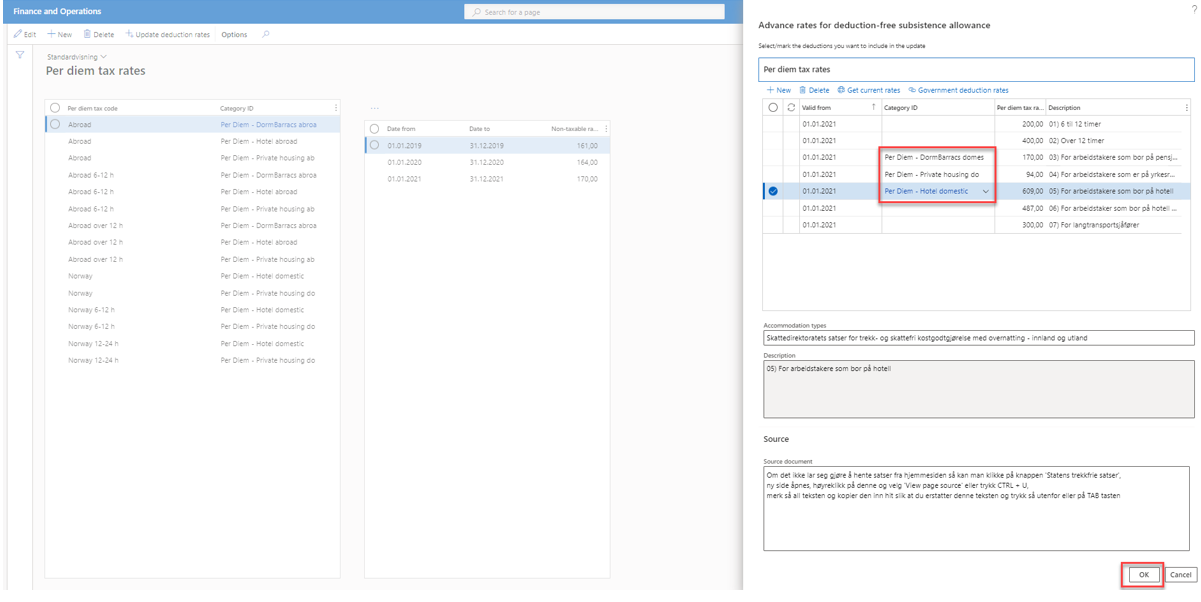
For updating rates for different Expense categories, put in Category ID and click on OK
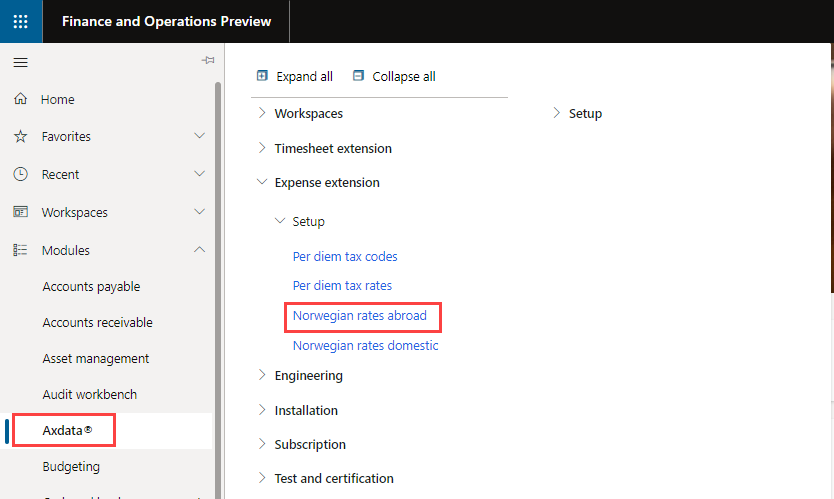
Norwegian rates abroad
Navigate to: Cepheo Expense extension > Setup > Norwegian rates abroad
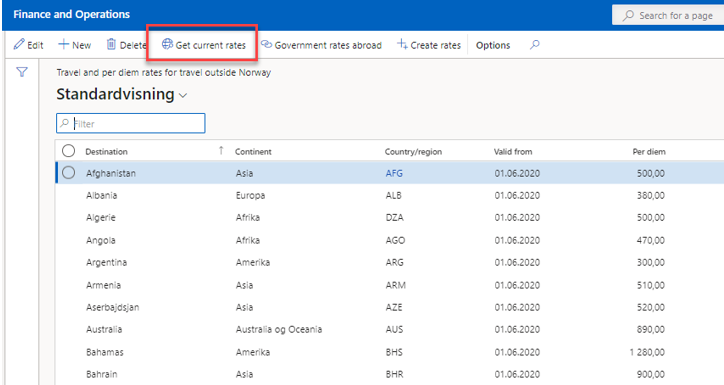
Select Get current rates.
They will be listed like the picture below.
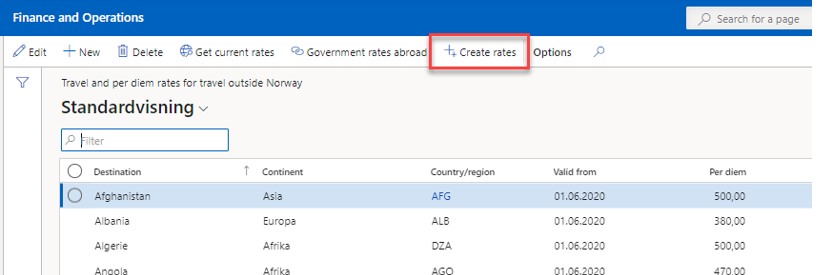
Select one, some or all Destination and select Create rates.

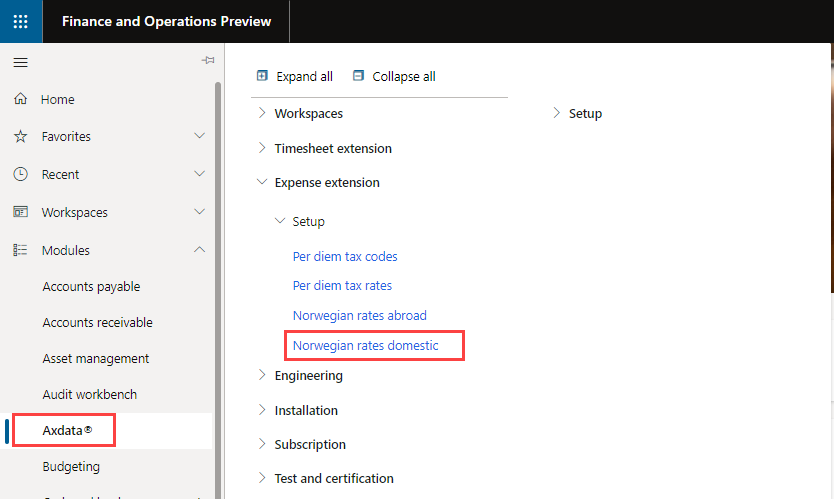
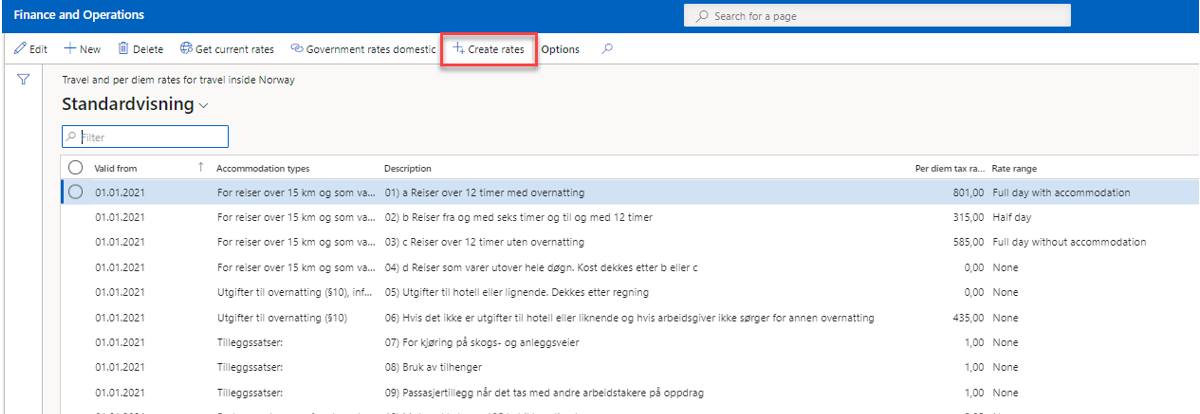
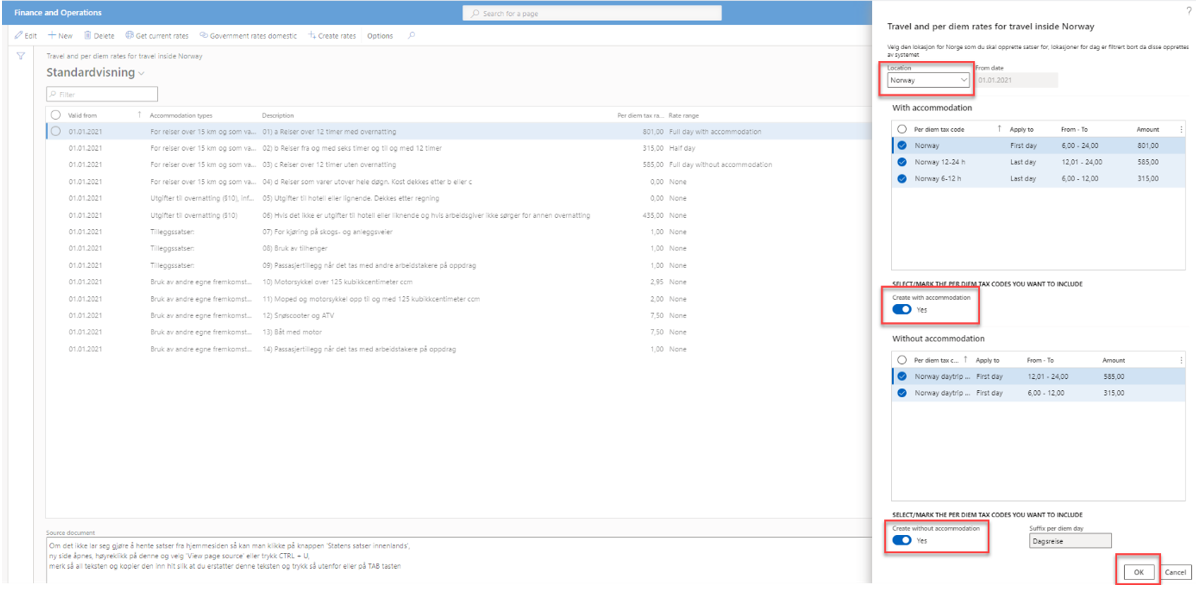
Norwegian rates domestic
Navigate to: Cepheo Expense extension > Setup > Norwegian rates domestic
Select Get current rates.
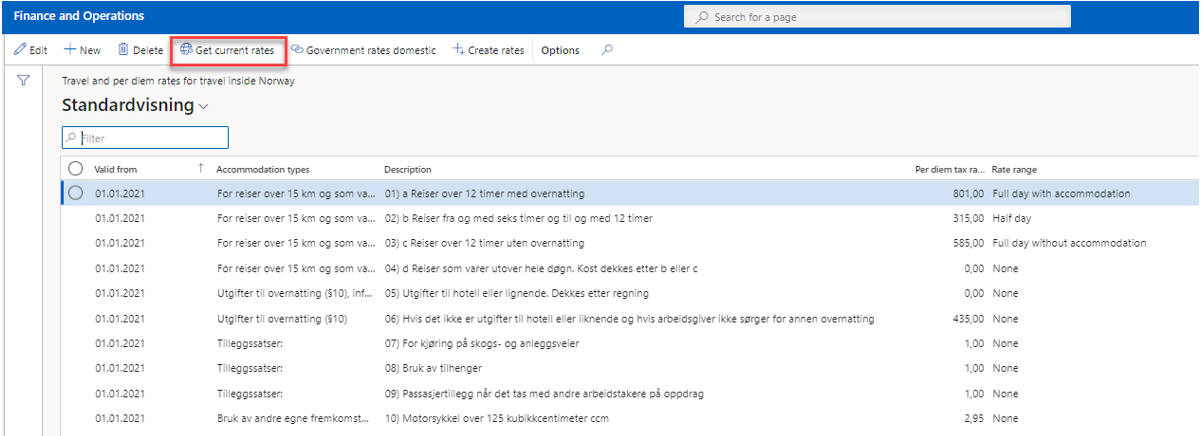
After importing rates, select Create rates.
Connect Per diem codes to Per diem amounts
Navigate to: Expense Management > Setup > Calculation and codes > Per diems
To create domestic without overnight stay, select “NOR U/Overnatting” and insert the Withholding tax periods as shown in the screenshot under:
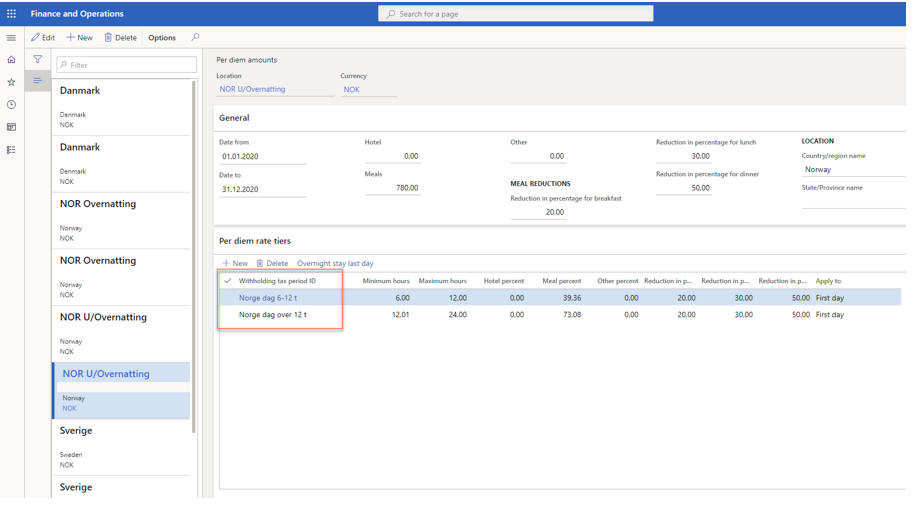
To create domestic with overnight stay, select “NOR Overnatting” and insert the Withholding tax periods as shown in the screenshot under:
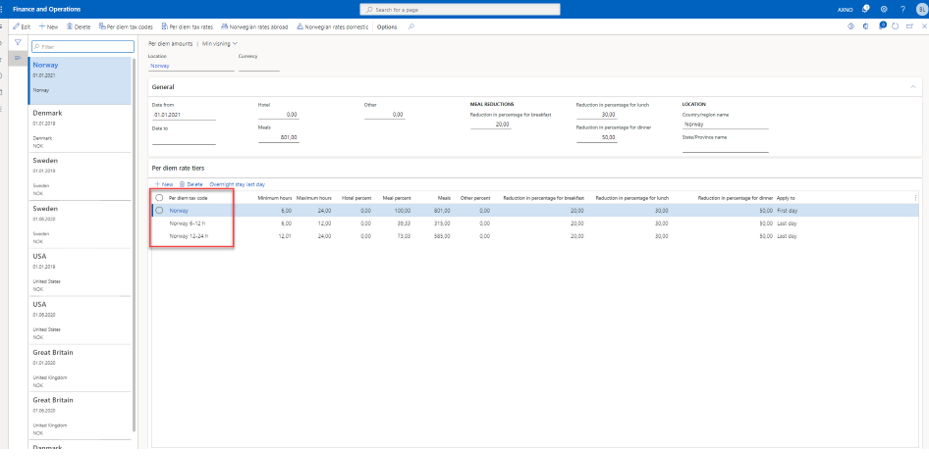
Select the last line (having hours from 12,01 to 24,00) and click “Overnight stay last day. In the new window, select “Norge” as the Withholding tax period ID and set the “Meal percent” to 100,00:

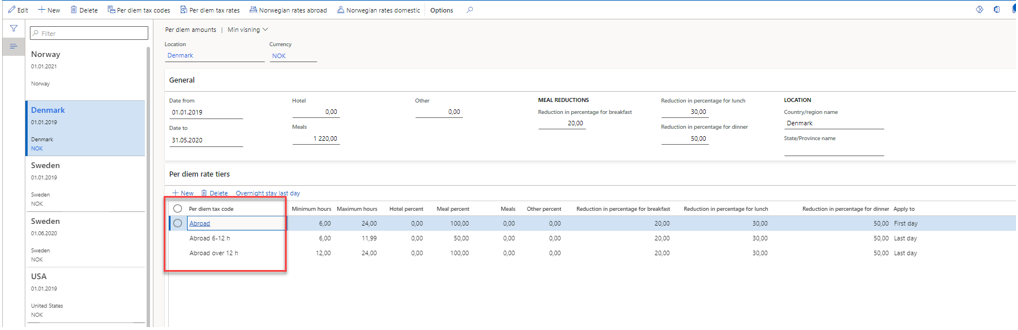
International: We have used Denmark as an example here, but select the different international countries you have listed here, and insert the Per diem tax codes as shown in the screenshot under:
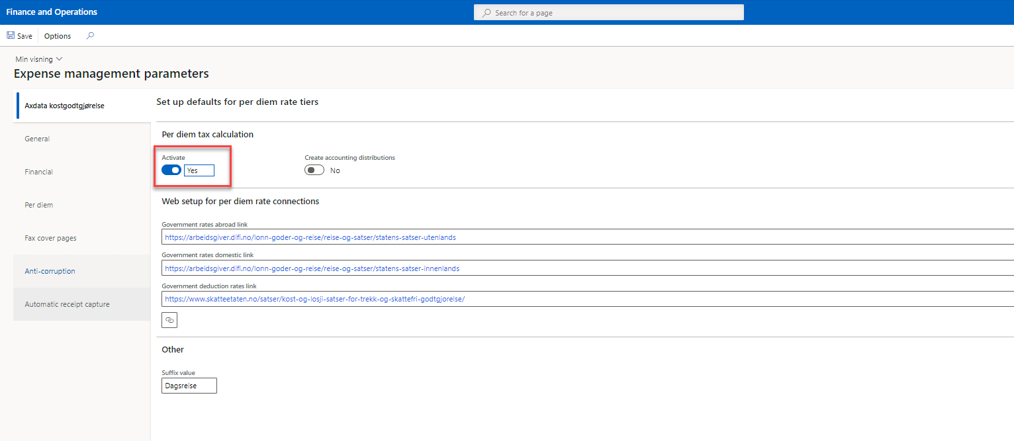
Per diem tax calculation
Navigate to: Expense Management > Setup > General > Expense management parameters
Turn on Per diem tax calculation
Under “Cepheo Kostgodtgjørelse”, turn on the “Per diem tax calculation active. This needs to be done after the full setup has been completed. When this is turned on, the calculation will be as wanted when employees start to fill out their expense reports.
If wanted, the “Create accounting distributions” can be turned on if you want D365 to create a financial transaction for the per diem tax part of the expense report submitted: