Cepheo Advanced Ledger Import
Cepheo Business Documents
Document examples
Business Documents configuration
General for all documents
Sales order configuration
Sales invoice
Sales packing slip
Purchase order
Project invoice
Quotation
Interest note
Work report
Dynamic payment information
Release notes Cepheo Business Documents
Cepheo Currency Import
Cepheo Engineering
Cepheo Engineering - Functional overview
Engineering setup
Engineering parameters
Engineering global parameteres
Change notification parameters
Classification Codes Setup
Item property setup
Manufacturer Setup
Material Quality Setup
Product setup
Spare Parts Setup
Released Item Setup
How to use Engineering
Release overview Engineering
Cepheo Expense Extension
Cepheo Expense Power App
Cepheo Foundation
HowTo
License overview
Model upload
Business events
Release overview Foundation
Release notes Foundation
Base.2022.11.2.21
Base.2022.8.2.19
Base.2022.8.2.16
Base.2022.8.2.15
Base.2022.2.2.11
Base.2022.2.2.10
What is Cepheo Foundation
Cepheo Human Resources Extension
Setup Human Resources Extension
Use Human Resources Extension
Release notes Human Resources Extension
What is Human Resources Extension
Cepheo Installation
Setup Installation
How to use Installation
Release overview Installation
Cepheo MVA-melding
MVA Setup
MVA Reporting
Step 4: Reporting
Step 4 | Section 1: Tax reports
Step 4 | Section 2: Standard tax codes
Step 4 | Section 3: Tax specifications
Step 4 | Section 4: Report remark
MVA Multicompany setup
MVA Intercompany setup
MVA Intercompany Tax report
Cepheo SAF-T reporting
Cepheo Sales Integration
Cepheo Shipment Booking
Shipment booking setup
Shipment booking external values
Transform addresses, senders and recipients to address quick ID's
Transform label
Transform carrier information
Transform country, state and county
Transform currency code
Transform print favorite
Transform shipment payer account
Transform container types
Transform shipment booking status
Transform security group
Shipment booking parameters
Document transformations
Shipment booking senders
Shipment booking labels
Shipment booking print favorites
Shipment booking security group (nShift Delivery)
Carrier container type
Shipment booking cost rule
Import Carrier setup
Setup of carriers
Shipment booking Sender
Shipment booking app setup
How to use Shipment booking
Notification contacts
Consolidate shipment bookings from Create Shipment booking dialog
Maintain content lines on a Container on a Shipment booking
Release overview Shipment booking
Cepheo Subscription
Cepheo Test and Certification
Cepheo Timesheet Extension
- All Categories
- Cepheo MVA-melding
- MVA Reporting
- Step 4 | Section 1: Tax reports
Step 4 | Section 1: Tax reports
a) Tax report tabs
Periods tab:
This section shows the tax reports for selected periods and some important fields such as Tax period, Vat amount, Interval…
To create a new report, click on the Create button.
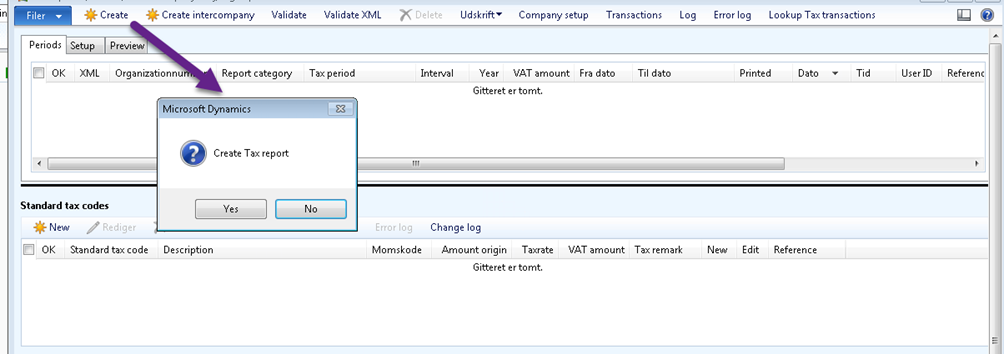
After clicking on Yes button in the dialog box, you can choose the period from which you will create the report.
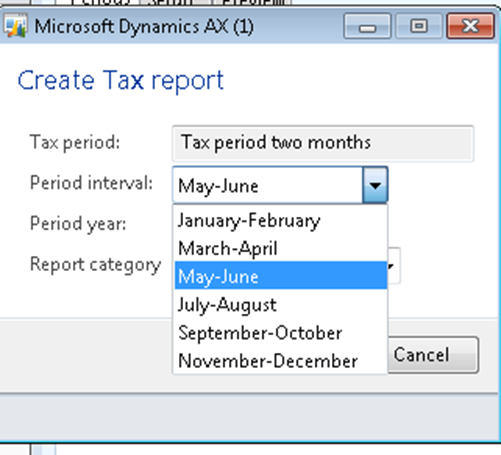
Write the year in the Period year and click OK.
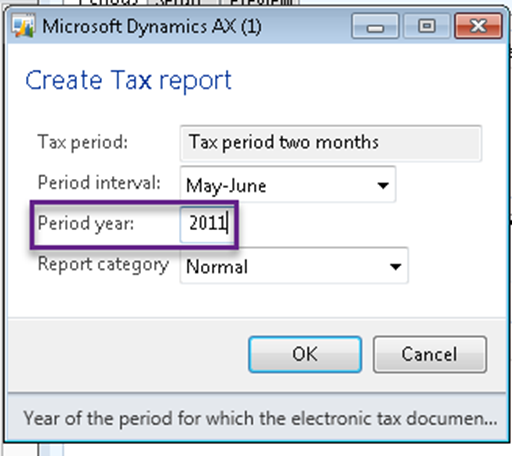
A new report is created for reviewing.
Setup tab:
In this tab you can write or overwrite the Customer Identification number (KID).
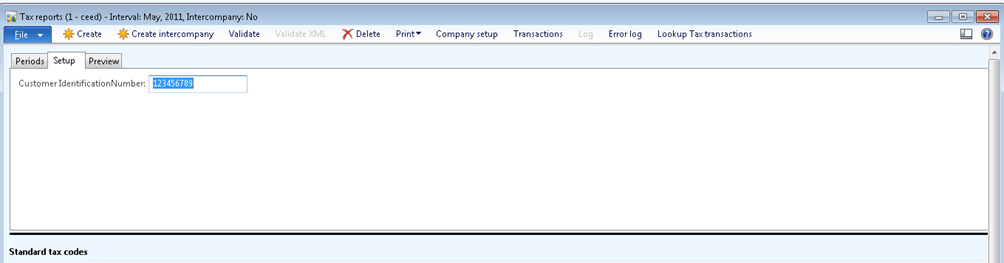
Customer Identification number (KID): The Norwegian Tax Authorities requires that this field should be filled out if some amount should be returned. Otherwise, the field should be left blank.
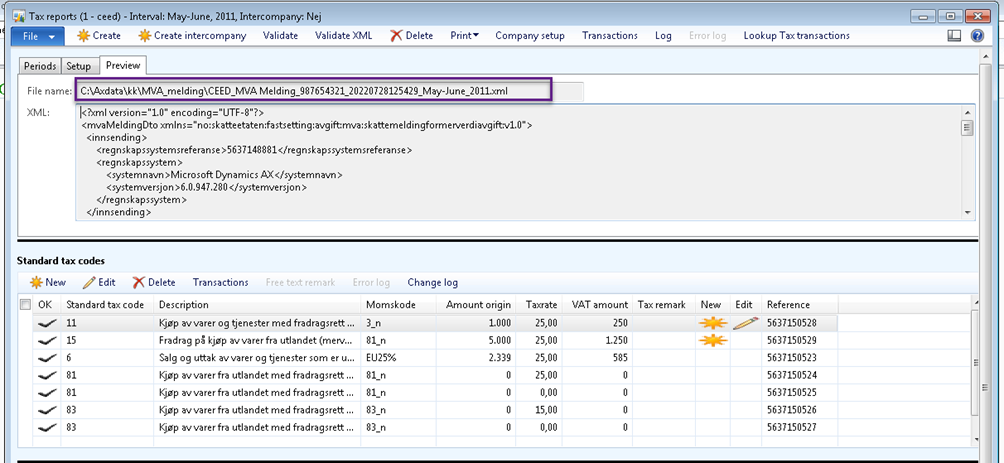
Preview tab:
The File name and Xml fields are filled out after printing the report. You can always find the file path from the File name field.
In the XML field you can see the actual file contents for control and documentation purposes.
b) Tax report Buttons:

- Create:
Creating a new report - Create intercompany:
Will be explained in detail in the Intercompany section - Validate:
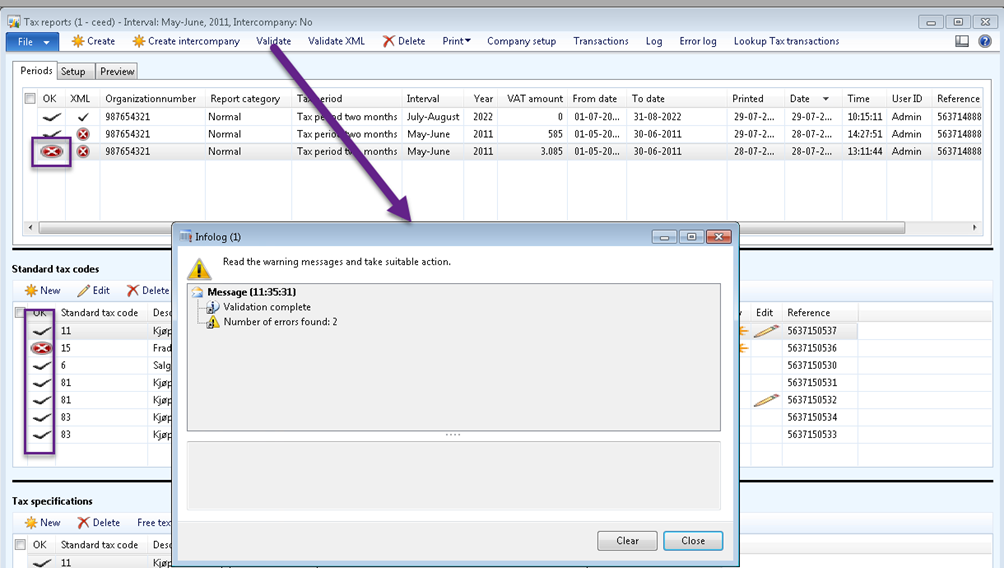
Validates the report and the transaction for the errors. If there are some errors a message appears with information about the number of errors. And a “X” mark in red color on OK field, both on Tax report and transactions section. You can find the errors in the Error log button and take the necessary action.
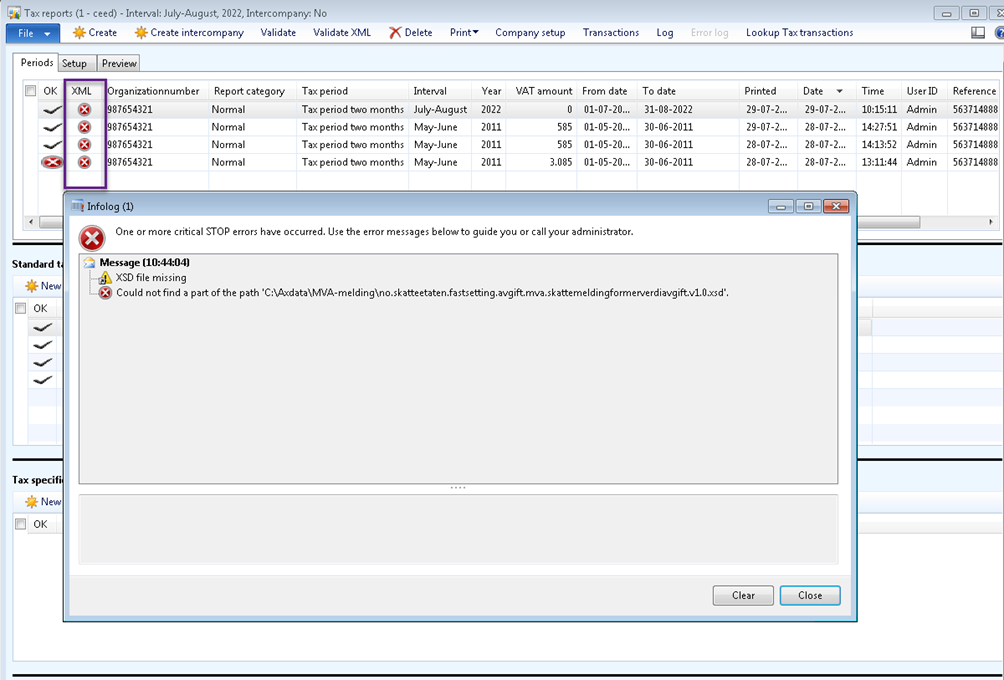
Validate XML:
This button is for validating the XML file according to the Tax Authorities requirements. Before Validating the XML field in Tax report is checked with “X” in red color. After validating the file, you might get an information message depending on the file validation status. An example of error after XML validating. The validating function cannot find the Schema file “XSD” path which is given in Parameter setup. For validation the Schema file “XSD”, the path should be given in the Parameter setup.
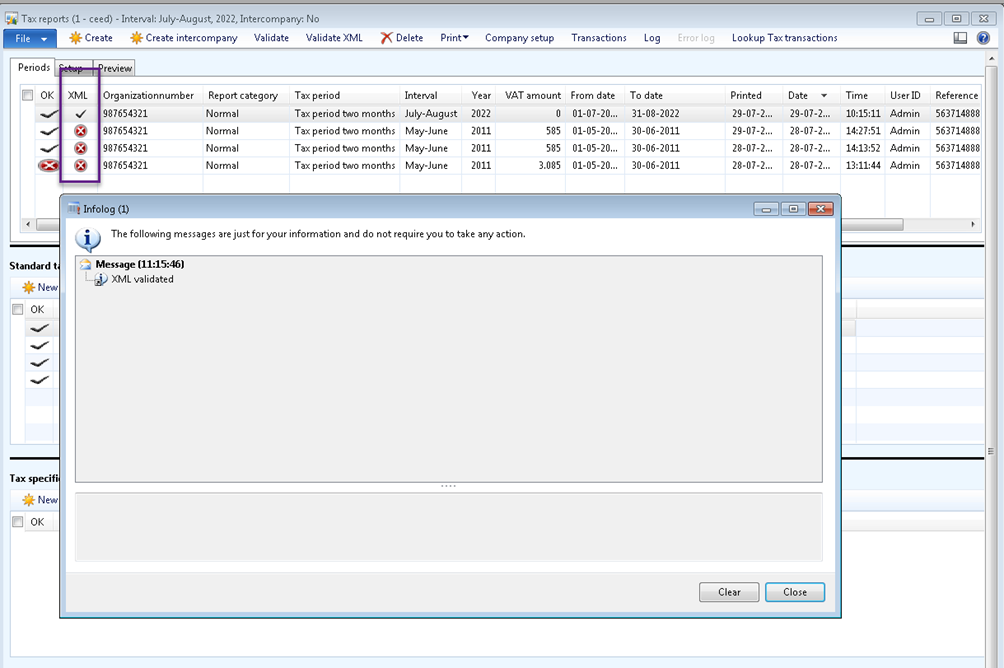
An example of XML validating after solving the issues.
Delete:
Deletes both the report header and the associated report transactions.
Print:
The button has 2 submenus
- Tax report – creates the report file in the xml format for later (manual) upload the report to the Skatteetaten website
- Company report – exports the report to a CSV file format for Intercompany report, for consolidating or any other purpose

Company setup:
Will explain in detail in the Intercompany section
Transactions:
Opens a from with all transactions for the entire report
Log:
Log history of the report
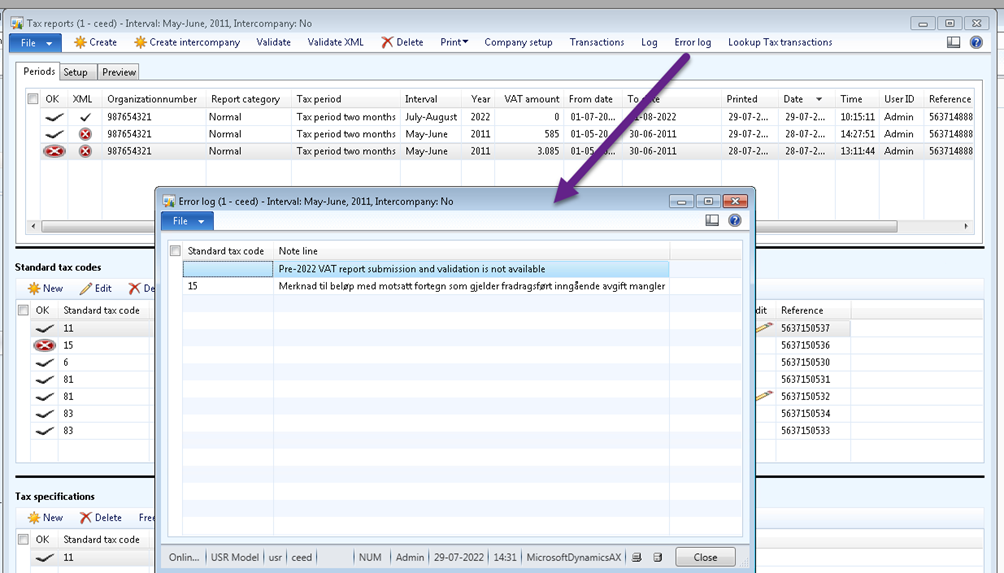
Error log:
Error history of the report. Her you can see only the error related to the selected record. Click on the button to read the cause of error and make the necessary changes.
- Example The first error is from the Tax report which says you cannot report for prior period than the actual period. The second error in in the transaction which expects a negative amount.
Lookup:
Tax transactions – Open the standard lookup of Tax transactions.